The Flower Wall
It’s not that it’s hard…
But it’s definitely not “easy”. You don’t need templates, or kits, or rulers. You really just need scissors and glue and paper and patience. Hold on, rephrase… a lot of paper and a lot of patience.
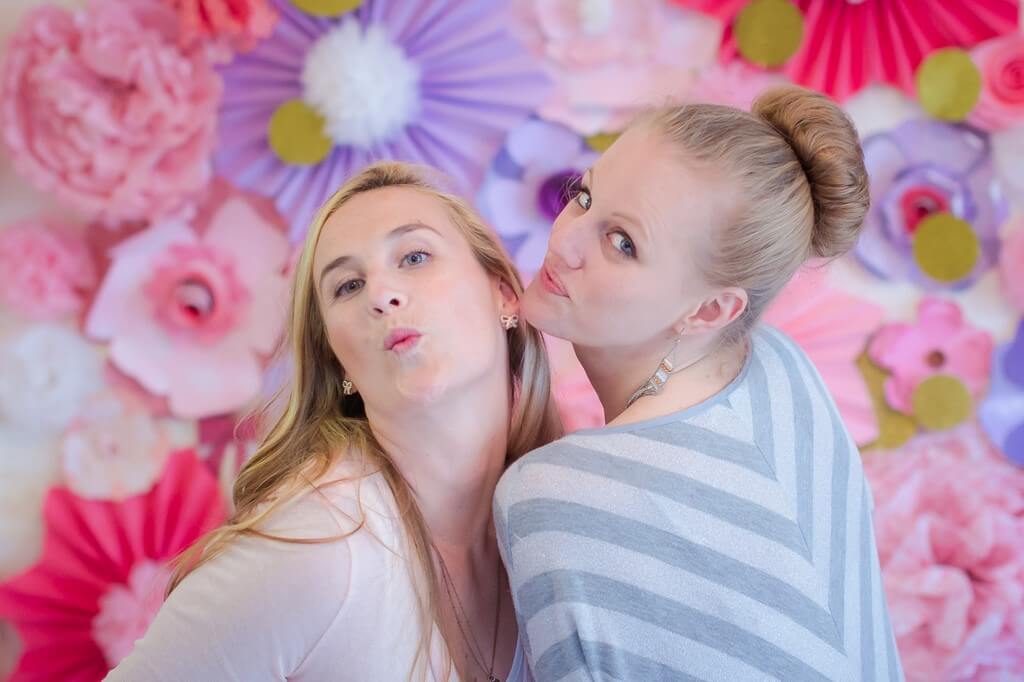
Pro Tip: for photos to come out better and not busy, have your subject sitting at least 4-6 feet away from the wall. If they are too close to the wall (which we had to be given the space) it looks like they are living in the wall. If they are further away it looks lovely and blurry in the background.
Cosette’s party was about a week away when the idea of a flower wall came to me. The “theme” for the party (if you can call a color scheme a theme) was pink and gold tutus.
Making a flower wall has been on my list for a while, so I brought it up to Brette. “Is this crazy or doable?” I asked her. We both decided that maybe it was both, but that’s never stopped me before! We had just the faintest glimmer of hope that it would all come together in the six days before the party, especially given that I was working full time and she has two toddlers that make the idea of paper crafting during their waking hours laughable. But we set off to the Hundred Yen Store (i.e. the greatest place ever) anyway, where we bought packs of pink, gold and purple paper and pink and white tissue paper flowers for ¥100 each (roughly a dollar).
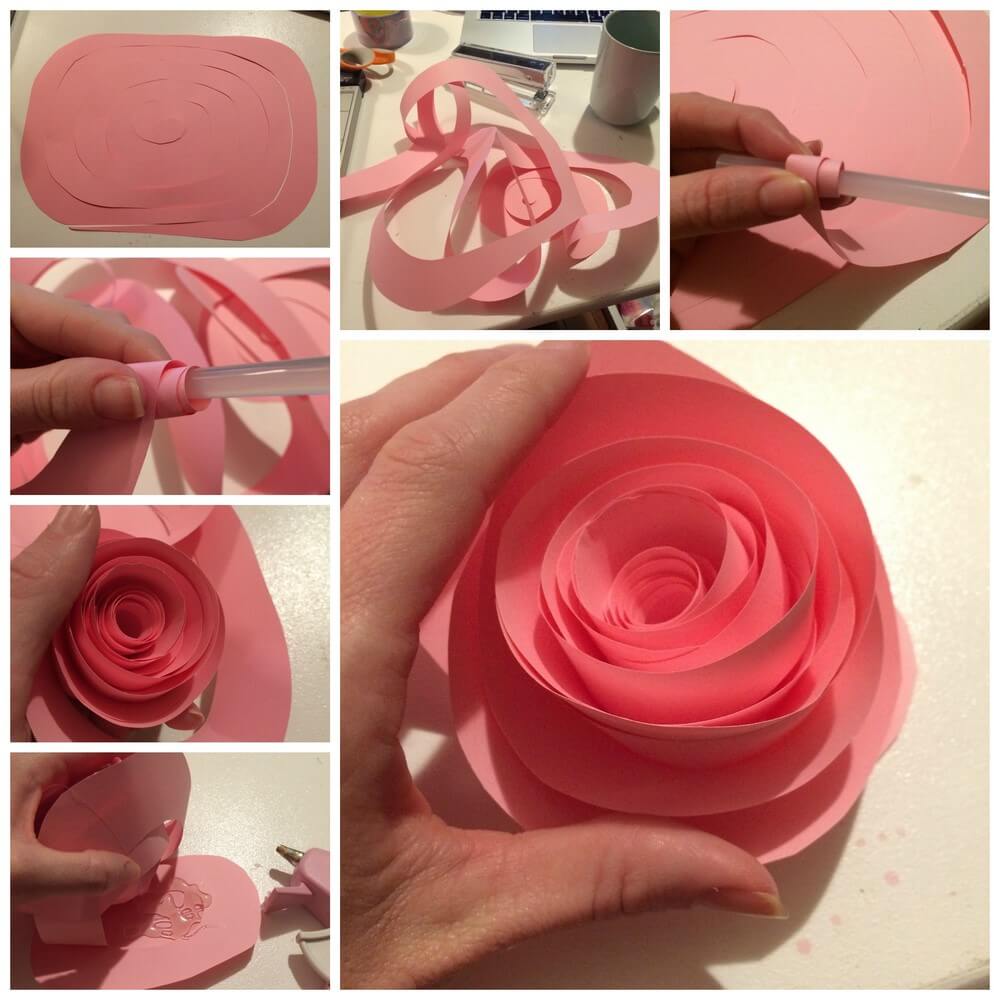
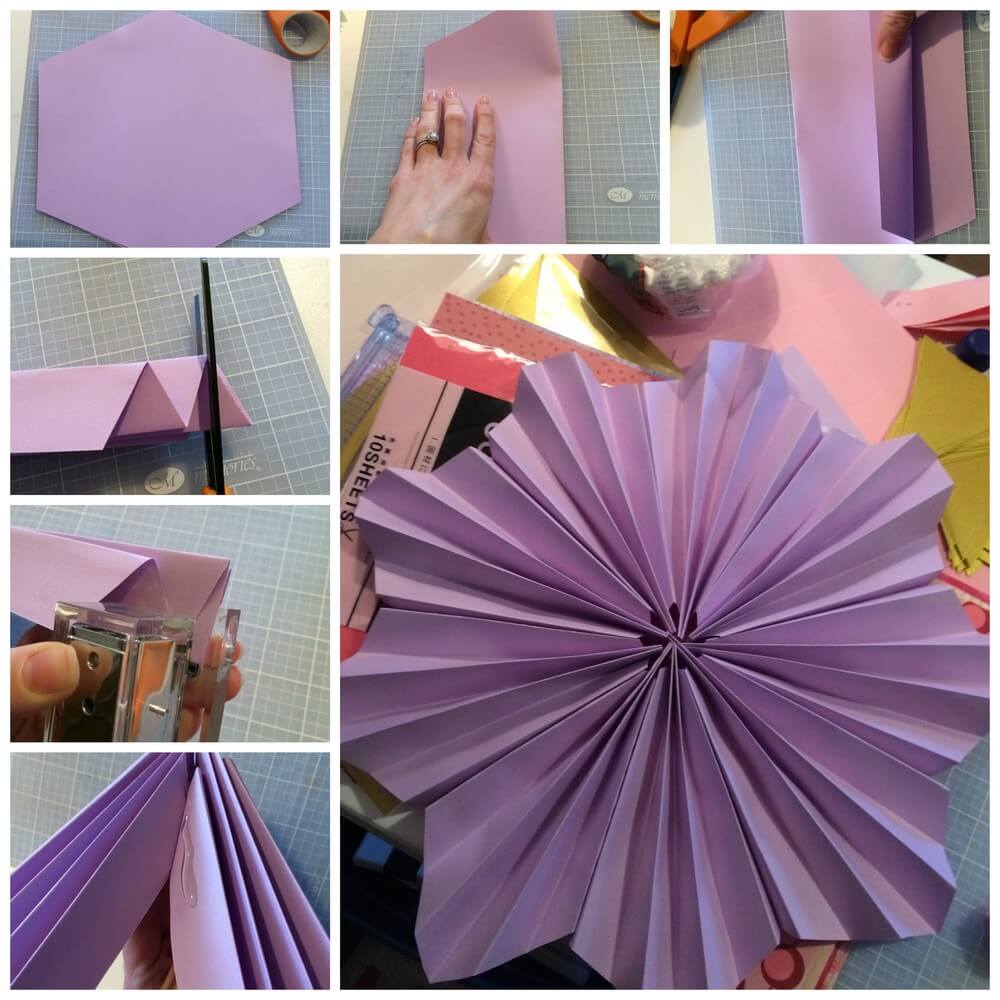
I took all the paper home with me to experiment, while Brette was on tissue paper duty. I looked up a bunch of tutorials for inspiration and then changed them up to better meet my vision. Here are a few of my favorites:
Paper Roses:
Hexagon-Accordion Flowers
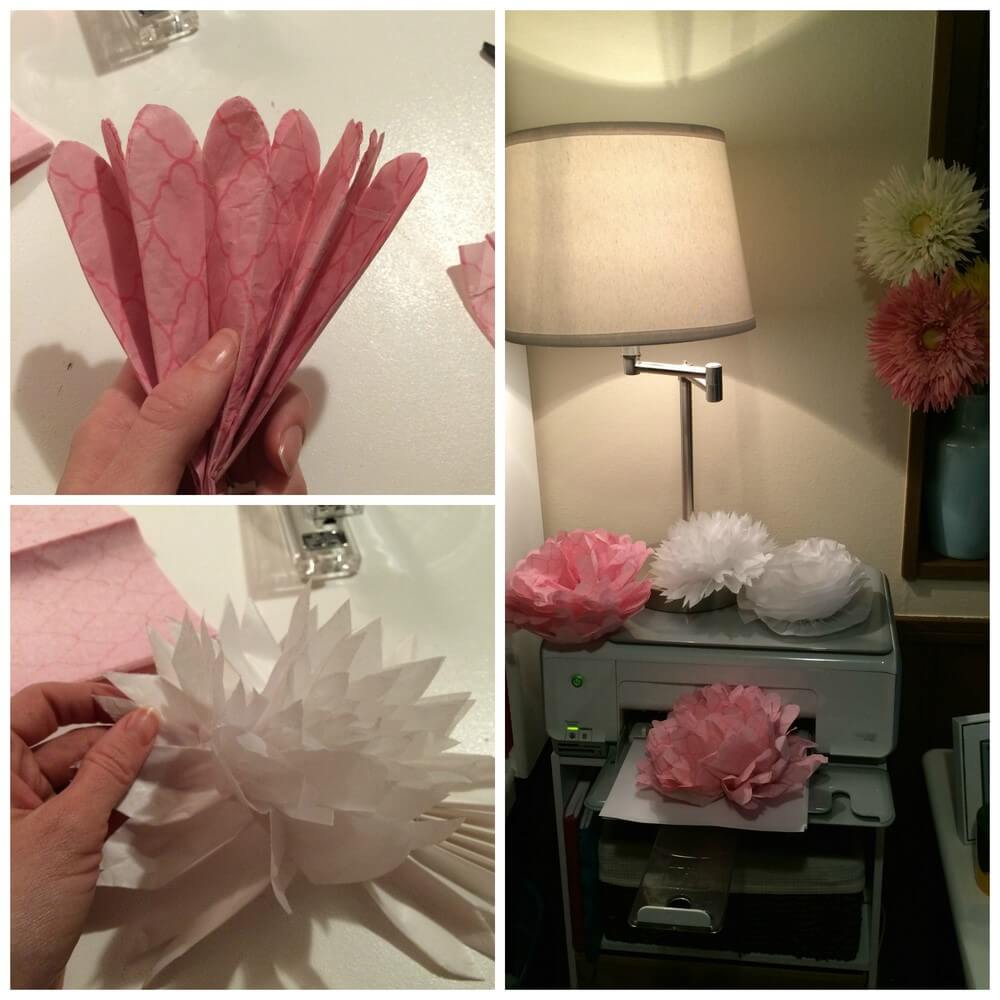
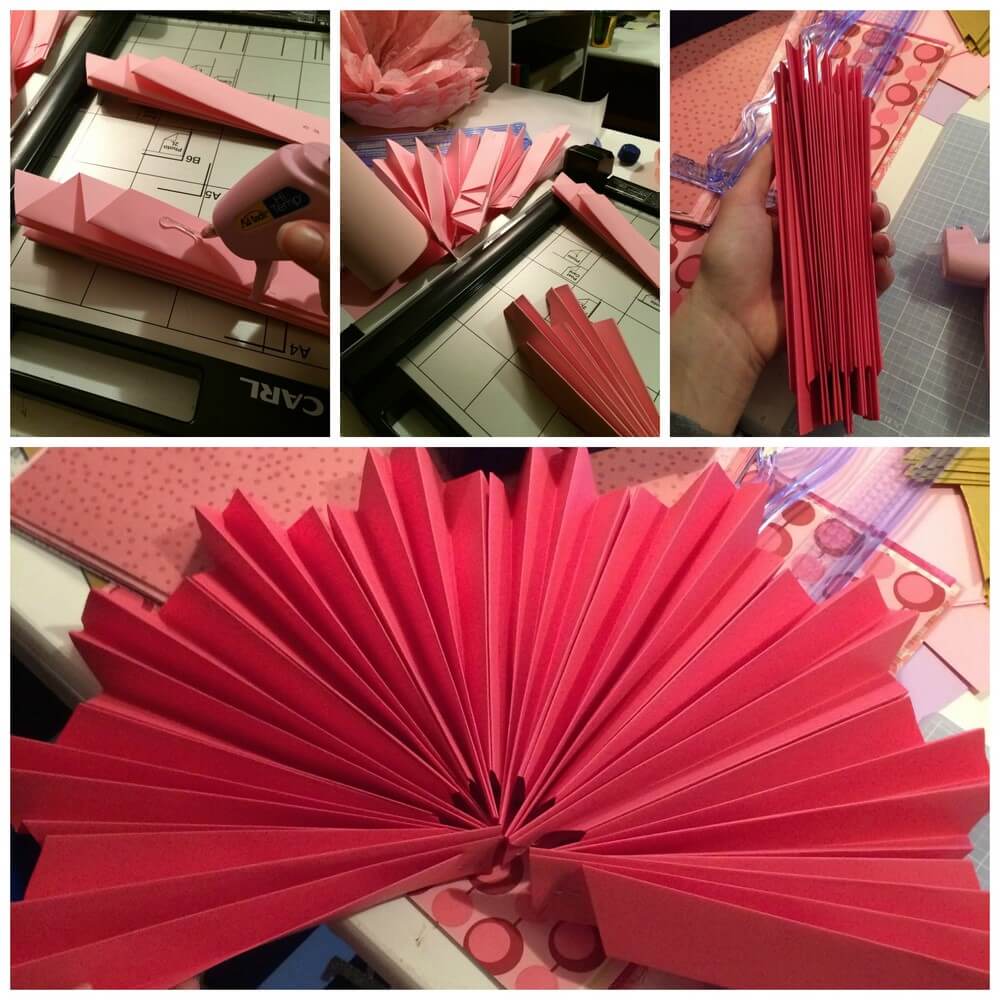
The tissue paper poofs are easy enough, so I don’t have a link for you… You just fold a fan, twist-tie the middle, and poof them out sheet by sheet. I’ve found that 8-10 sheets of tissue paper create the full looking blooms I love, but when tissue paper is running low, I’ve also made them with 6 sheets. Another thing to point out: I really like the finished look if you take a moment before fluffing to cut scallops or points on your strip of paper. Much more flower-like, in my opinion!
With all of these flowers out of the way, I also wanted to put a dent in the collection of patterned scrapbooking paper that I abandoned when I started making digital photo books. The switch has saved me a fortune in rubber cement (and probably spared a lot of brain cells thanks to the lack of fumes), but it’s also left me with boxes full of 12×12 paper with no real purpose.
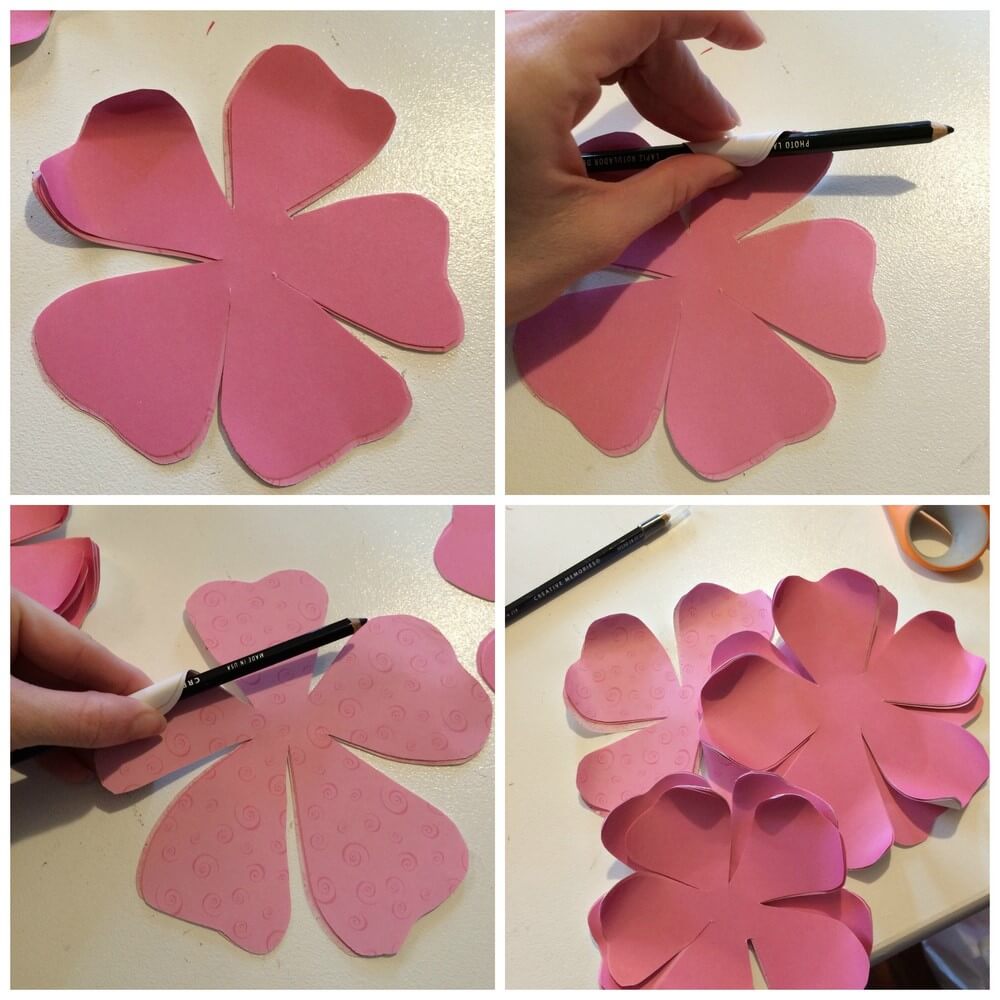
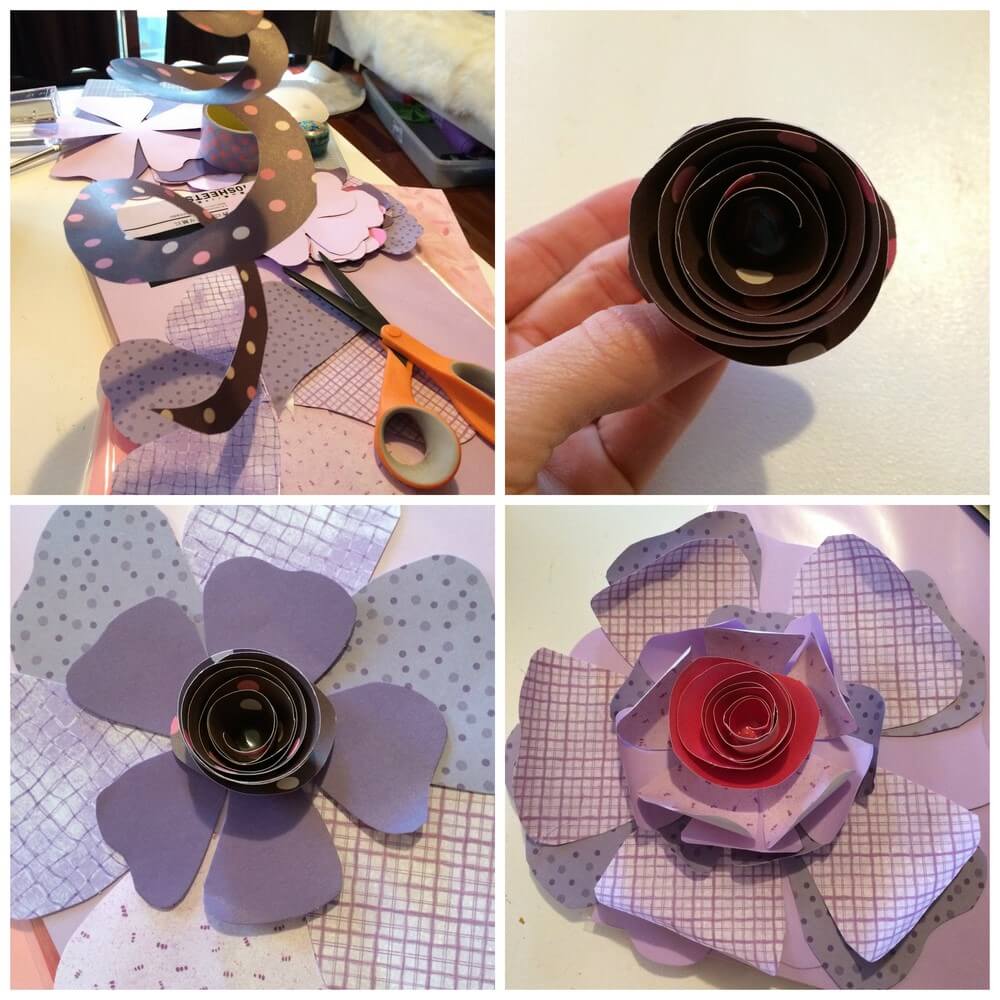
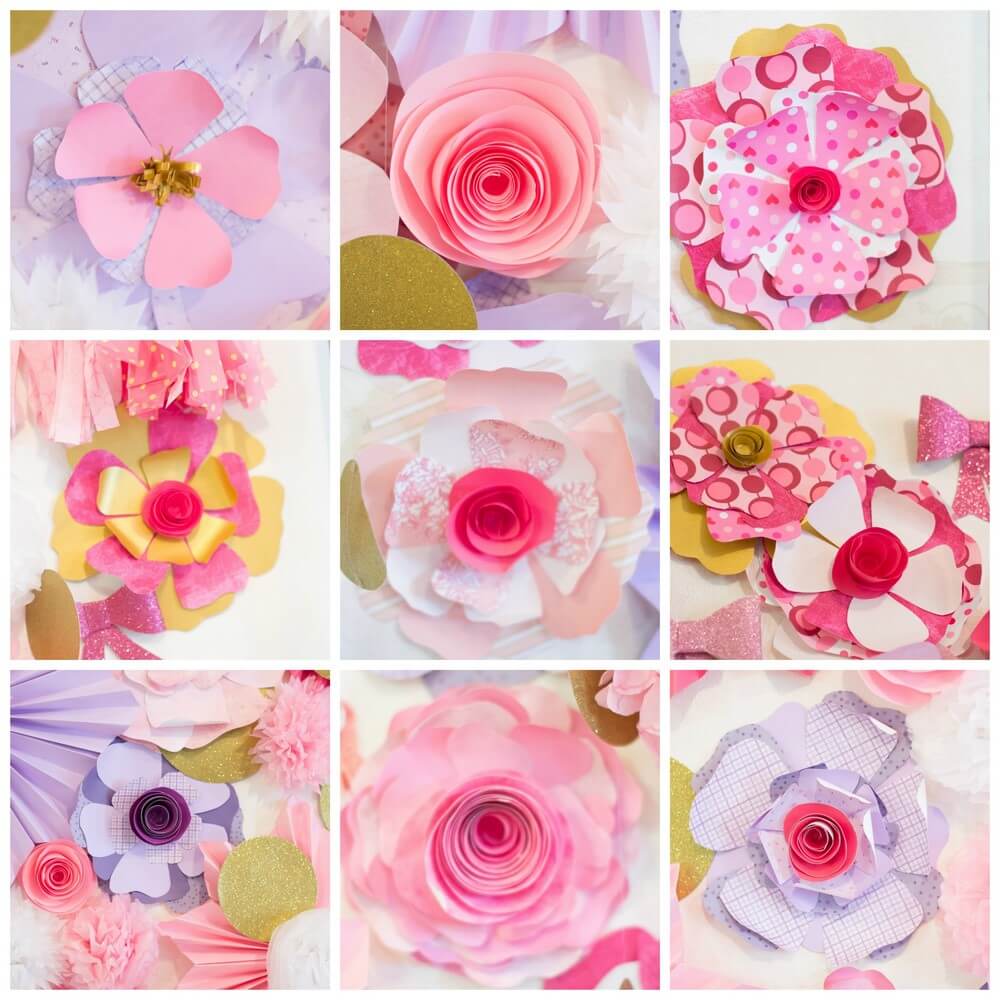
I didn’t use a tutorial… I think it’s pretty self explanatory. I cut flowers out of the paper in different sizes and then stacked one on top of the other until I achieved the look I was going for. I decided not to use a stencil or template, but just to eyeball the flowers as I was cutting to make sure that they weren’t too uniform. The number of petals per flower ranged from four to six, depending on size and petal detail. Because so many layers of paper were stacked, it didn’t matter if each cut wasn’t perfect. In fact, I really like the individuality that the petal variation gave each flower. Plus, there was no chance we would end up with any two alike with my cutting skills!
I used a pencil to roll the corners of the flowers to give them a little more dimension, and because I fell completely in love with the look of the paper roses, I made a lot of those in miniature scale to use in the middle of some of my stacked flowers.
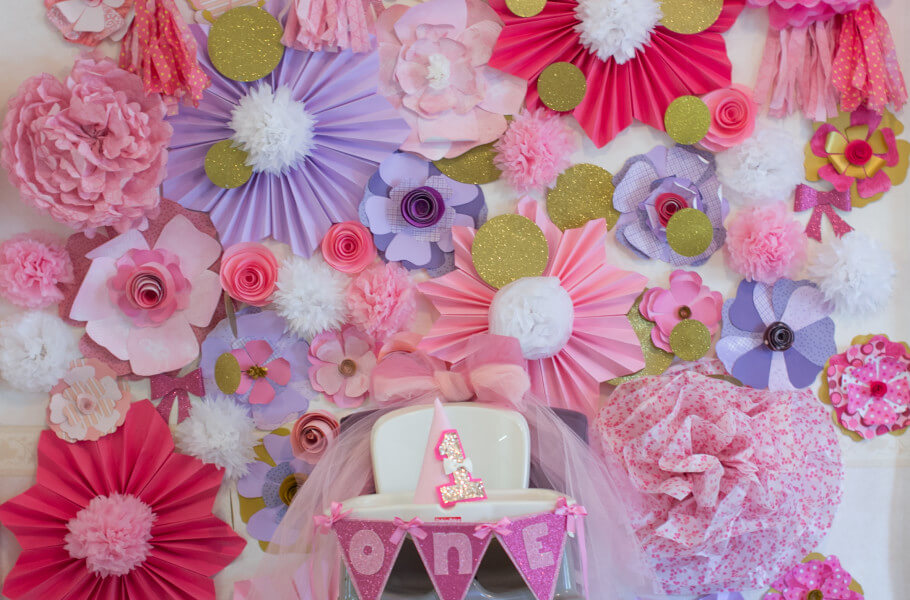
I love the look of the stacked flowers individually, and when they were all grouped together, I think it added something really unique to the wall. One of our biggest compliments was from a friend who told us that she had changed her kids outfits to coordinate with the flower wall after we had posted a preview of it.
Brette left the wall up for a little while after the party, it seemed like such a waste to take it down too soon! When she did finally take all of the flowers down though, I used a few of them for a gender reveal photo shoot I was doing (luckily… it was a girl!). But after that last hoorah, I had no idea what to do with all of these beautifully handcrafted, labor intensive, paper flowers! I hated to throw them away, but I have absolutely no where to store that much pink in my house!
We went back and forth about what to do with them and finally I asked her, “Do you think someone on Okinawa Yard Sales might buy them?” We didn’t want to ask too much and end up with zero interest, so I put up a couple of pictures of the flowers in garbage bags and asked for $20 OBO. Big mistake. Big. Huge. (I’ve always liked that Pretty Woman line, and just felt like using it. It wasn’t really a big mistake, except that we very quickly realized we could have asked for a whole lot more). Within a minute, I kid you not- in less than 60 seconds, someone said she would come by with cash to pick them up. By the time I finished brushing my teeth there was a waiting list of about 6 people. By the time there were a dozen people claiming dibs on “next”, I started getting private messages from people offering to give me more than I was asking for. One girl messaged and said, “I will bring $50 and can pick up right now.”
Unfortunately, I had already agreed to the first girl, so we sold the whole lot for $20. However, with the obvious interest in flower walls, we decided maybe we should start taking on some custom orders. Brette and I did some quick pricing, and added to our post that we were happy to customize a flower wall for each person’s event for $60- $150 depending on the size of the wall and the materials used. We are now asking $20 for the number “One” (that we threw in for free with the flowers)… And we already have orders in place. Not a bad day.
I guess that makes us professional flower wall designers. No big deal. We promise not to let this success go to our heads. ;)
Leave a Comment cancel
MOST RECENT IN "TRAVEL"
VIEW ALLMOST RECENT IN "PROJECTS"
VIEW ALLMeet Mindy
In 2013, I quit my job and bought a one-way ticket to Thailand. After four months of backpacking I returned to the States and fell in love with a guy whose job sent us straight back to Asia. Nothing has gone according to plan... and it's been absolutely magical.
Read more
Search WTW
Archives
Copyright © Walking Through Wonderland 2012 - 2026. All rights reserved.



Obsessed with it. So awesome. Gonna give this DIY tutorial a shot.
Can’t wait to see it!!!
Pingback: Cosette's Pink and Gold Party
Love this! I love (read: I’m obsessed) with photobooths and I’m always looking for background inspiration. What a great idea annnddd a great use for all of the paper that my husband insists that I get rid of before we PCS. haha!
*laugh * Too funny about your unintentional business venture, and good luck with it! The flowers are beautiful! Of course now you’ll have to consider what to do when you run out of 12×12 sheets! :)
this is so beautiful, I remember seeing you pinning some similar ones on pinterest, I am so pleased (and super impressed!) you made it! I am not surprised you have orders for them!
Pingback: Cosette's Pink and Gold Birthday Party