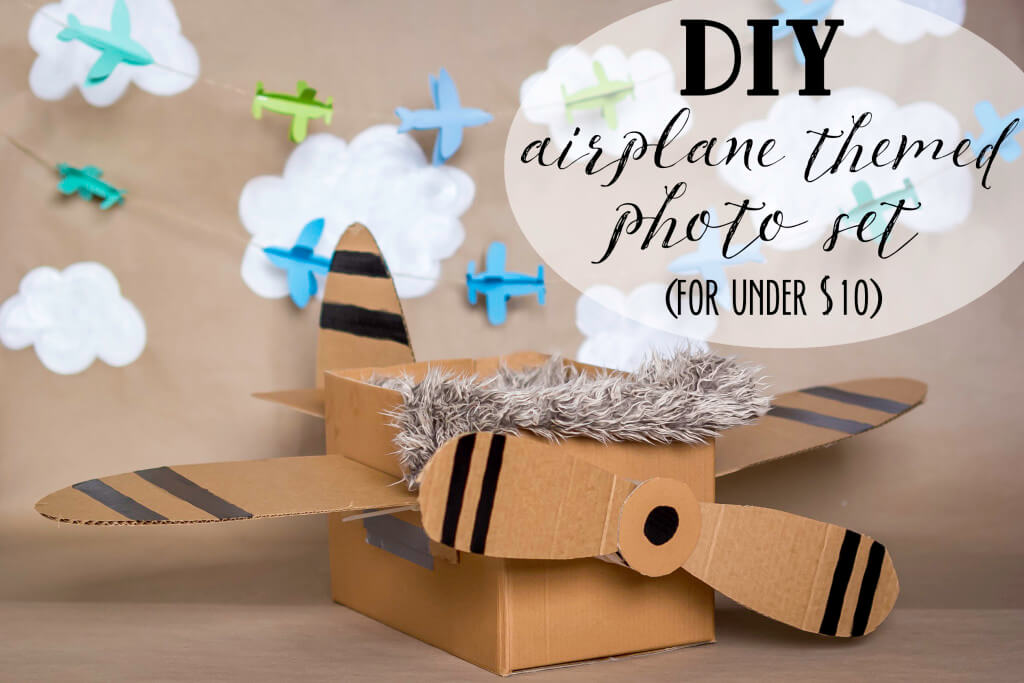
The whole set up cost less than $10… and you can easily make everything yourself.
Got cardstock, kraft paper, twine and an old box? You’re golden. This “tutorial” is almost too easy to post but our DIY card board box plane themed photo set just came out too cute not to mention!
A few weeks ago I bought a roll of kraft paper for a dollar- or 100 yen to be exact. I was designing menus for a friend’s wedding and we liked the idea of little kraft paper hearts with white calligraphy on them. After cutting out dozens of hearts and writing “Bali Bliss” for two hours, we decided we didn’t like them after all and scrapped the idea. That left me with a roll of craft paper and a new idea.
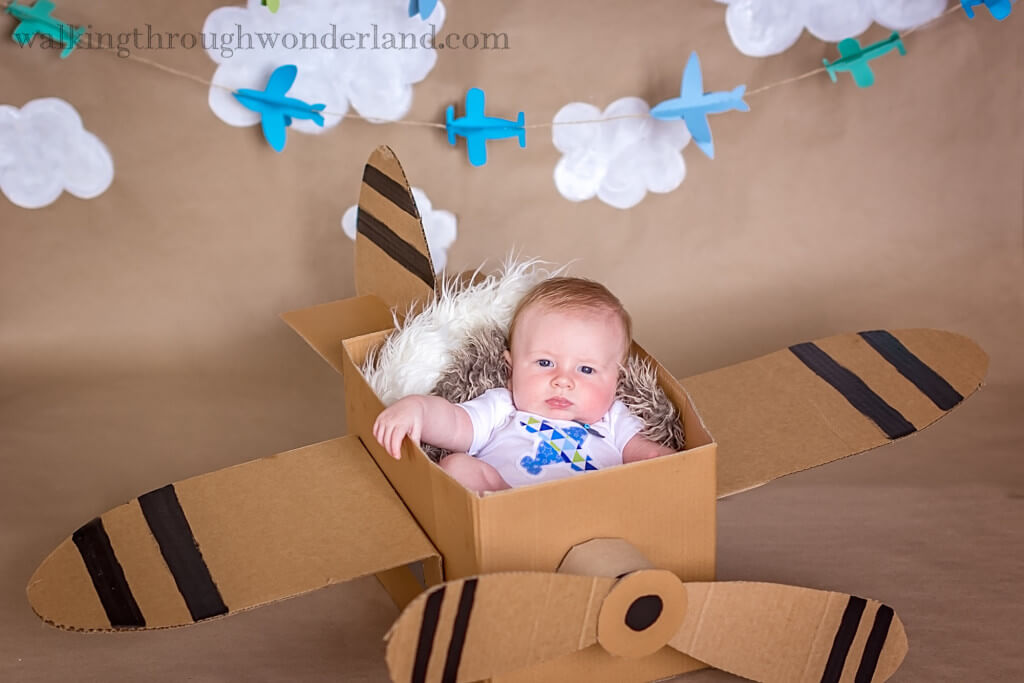
I’ve recently started playing with studio photography because it gives me so much freedom to create cute sets. When I saw a little cardboard box plane on pinterest I knew it would be a fun prop to create an entire set around. Because it’s the rough-around-the-edges look that makes this cardboard box plane so cute, I wanted the whole set to be in keeping with the handmade theme.
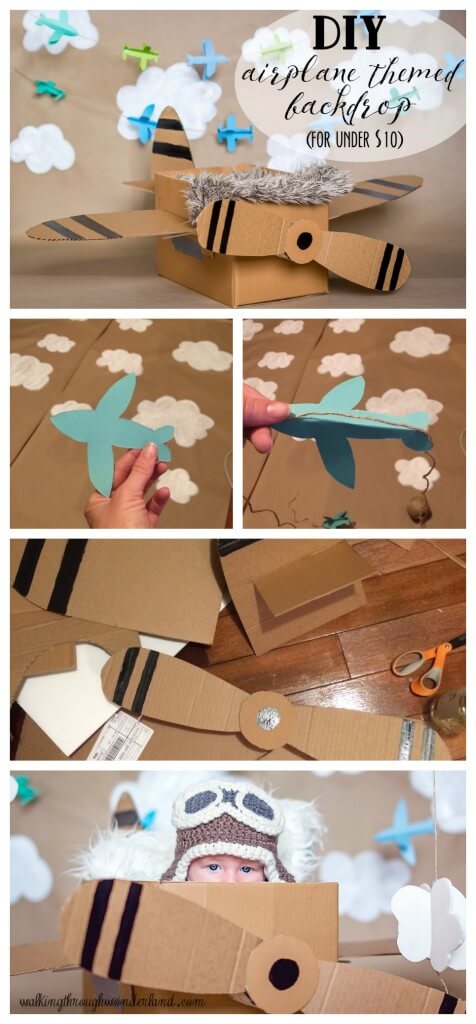
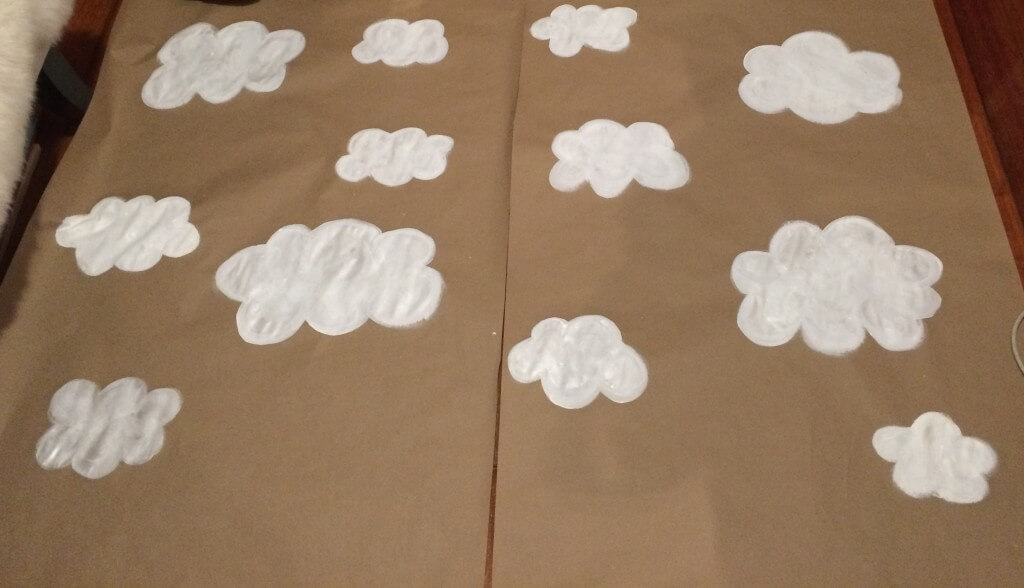
Rather than using one of the (three) vinyl backdrops I’ve acquired over the last month, I decided to use the rest of the kraft paper roll and paint some fluffy white clouds on it. I made two panels, each about 5 feet long. Kraft paper is thin and not really meant to be painted, so it got a little bit wrinkly as I was painting my clouds, but as soon as it dried this didn’t seem to be an issue.
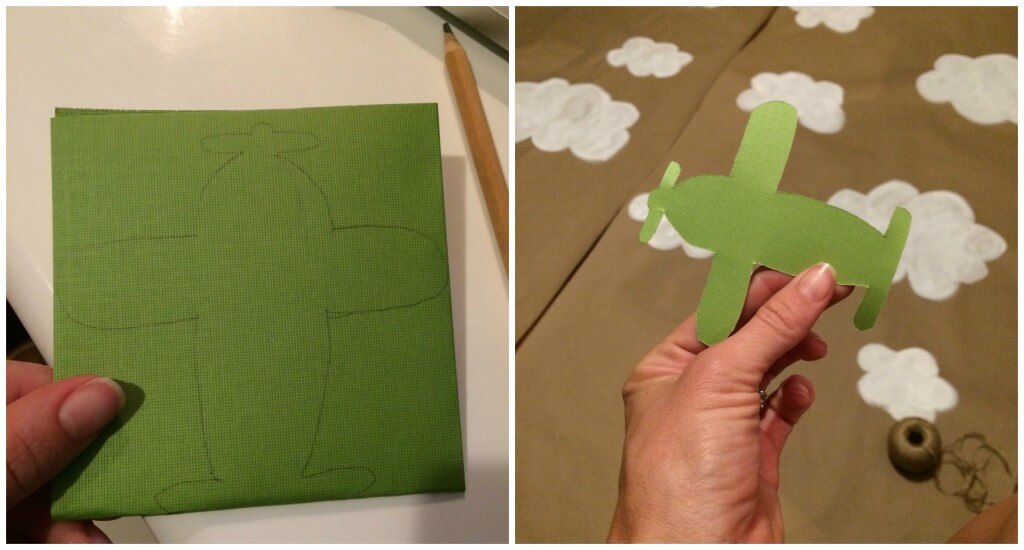
With the craft paper done, it was time to make a paper plane garland. I called mama to find out what her son was wearing for his milestone photos and created the garland accordingly. He had a little blue and green airplane on his shirt, so I cut out planes from four different shades of blue and green textured card stock. Make sure that you have an even number of each plane in each color because each “plane” on the garland is made up of two pieces.
To make the garland stand out as a 3-d feature on an otherwise flat background, I folded each plane in half and stapled them onto twine to make 90 degree angles.
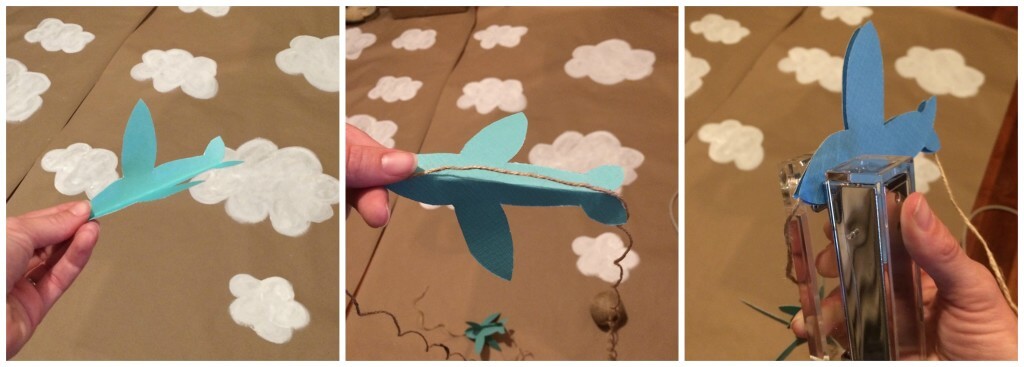
I thought about using ribbon for another pop of color, but decided hemp twine would work best with the cardboard box plane and the kraft paper backdrop without distracting from the cute little 3-d planes.
I still wanted a little more dimension so I spent another dollar (or 100 yen) to get a piece of foam board. I used a razor to cut very rough clouds out of the board, then folded them as well. The inside foam part of the couds cracked in half but the paper held the shapes together. I hot glued them onto long strands of twine, leaving several feet of twine on each end so that I’d be able to tie them to a ceiling fixture or tape them up.
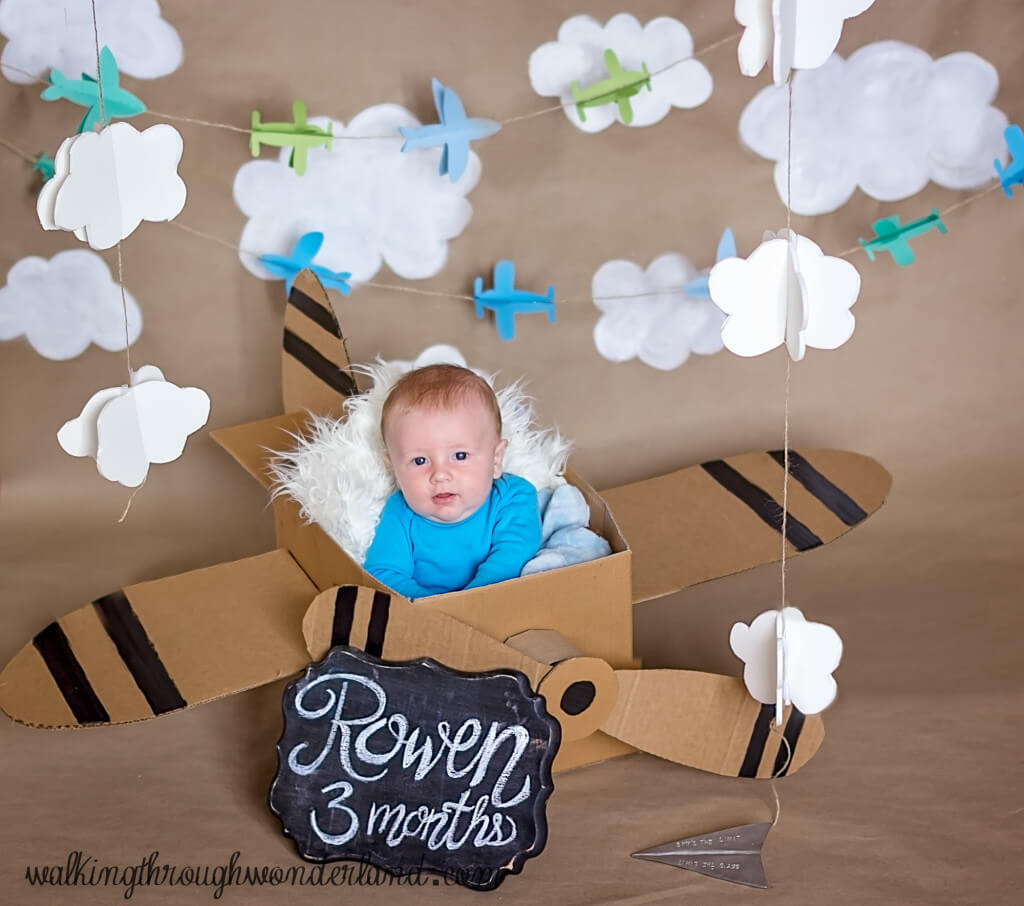
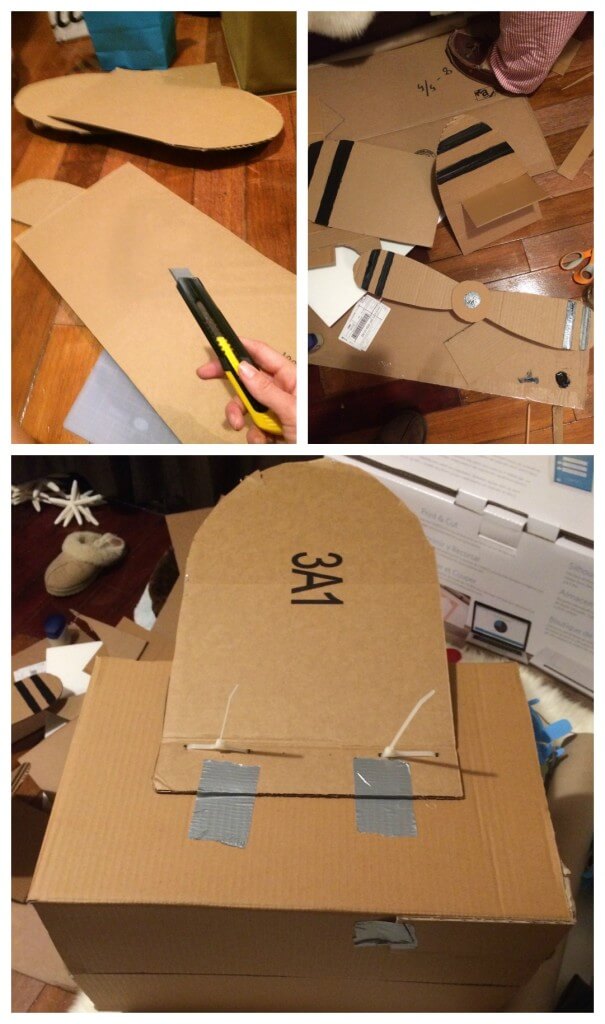
The last piece of this set is my favorite part: the cardboard box plane. I had seen them all over pinterest and they are all cute, but with my pilot husband’s assistance, I’d wager that ours is structurally sound. “The tail should be higher.” “It actually shouldn’t be shaped like that.” “You are putting that on backwards.” After a few of his “helpful” suggestions I turned the box over to him. He took it out of the craft room and a few minutes later I heard the drill going. I guess zip ties are more practical for attaching wings to a cardboard box plane than the tape I had used. Ahhh…
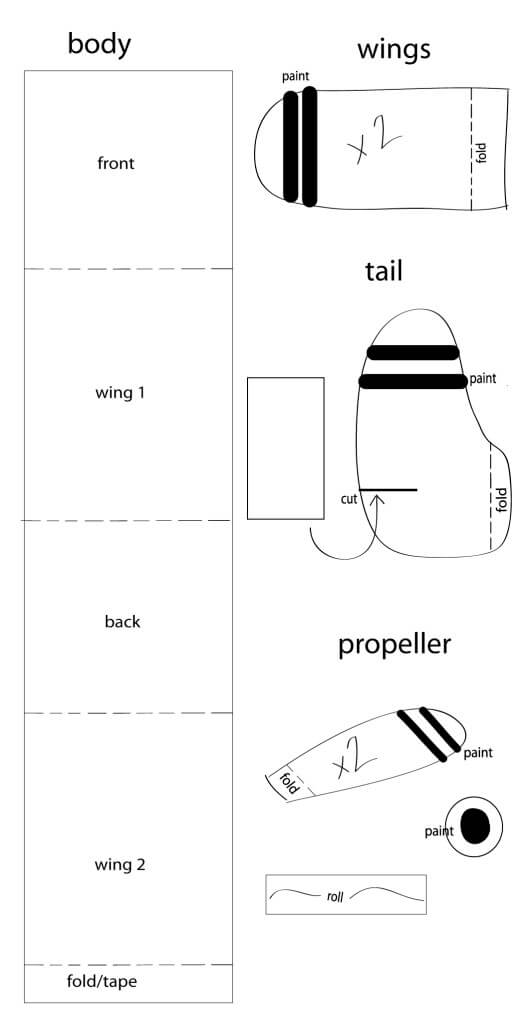
I used two cardboard boxes to make the plane. I cut out each of the pieces and then cut a second box into a long strip so that I could fold it backward to avoid any labels or marks on the box. This also helps you customize the size of your plane’s body. We ended up adding a bottom to it for extra stability, but it’s not necessary and folds up much easier if you don’t.
Here is a rough sketch of each of the pieces needed. The only things you really need are a razor or strong scissors, duck tape and paint, however, I will admit that the zip ties were probably a good addition.
All in all it probably took several hours to make everything, and another 30 minutes the following day to assemble it all to my liking, but you just can’t beat the price tag!
- Kraft paper roll – $1
- Paint: black and white – $3
- Twine- $1
- Cardstock- $3
- Foam board- $1
- Cardboard boxes- recycled
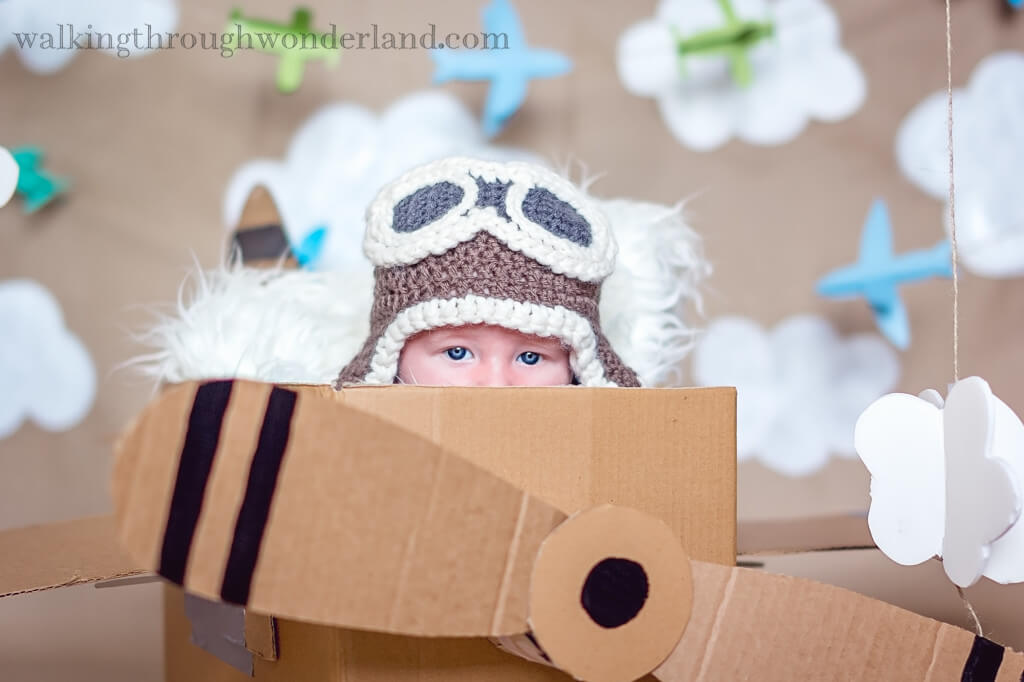
Oh…. and if you are feeling extra crafty, you can crochet that adorable aviator hat using this free pattern: Crochet Aviator Hat

MOST RECENT IN "TRAVEL"
VIEW ALL
MOST RECENT IN "PROJECTS"
VIEW ALL

Pingback: Plane Themed Photo Shoot | Walking Through Wonderland
O.M.G. I *LOVE* this! Soooooo cute. The zipties are an awesome addition – my kiddos are so hard on any kind of cardboard construction – zipties are just the ticket to hold it together and kudos to your husband for coming up with that one!
You are too sweet! Thank you so much… yeah I was REALLY glad he did it while I was transporting!