
For the past year I have been promising to put up a tutorial on how to make tutus. It all started three years ago with my friend Leanna. (I feel like so many of my blog posts start with that line. Just like I feel so many of the projects in my life have started with that line. I suppose I could just call Leanna my muse.)
Anyway, we were walking through the mall (also a reoccurring theme) and saw a kiosk full of tutus. She wanted to get one for Madelyn’s first birthday so we started sifting through layers and layers of girlie, frilly, goodness. Then… I looked at the price tags. They were all selling for $35-$50, and as you can probably predict, I uttered the mantra Leanna is so used to hearing. “I could make these.” Bless her little heart- she put off buying one and put her faith in me. Now, I make tutus. For EVERYONE. I have made Gator tutus, ballerina tutus, peacock tutus, Fourth of July tutus… I’ve even made a Seminole tutu for one very special friend.
So today I will try to explain exactly how to make these tutus for about $15 rather than the $50 you would spend buying one.
You will need:
- Between 16- 22 yards of tulle depending on how “fluffy” you want it.
- A little girls stretchy, woven headband (available at Walmart, craft stores, or anywhere with girlie accessories)
- Fabric scissors
- Time
When you buy tulle, they cut it from the bolt so it is already conveniently folded in half when you get it home. I like to cut strips that are approximately 5 inches wide. Depending on the height of your child and desired look, you will cut strips anywhere from 12 inches to 24 inches long.
Keep in mind that you will have the strips folded in half so calculate how long you want the tutu and double it. For example: If you want about 6 inches of skirt (perfect for an infant) you will cut strips that are 4-5 inches wide and 12 inches long.
To reduce the amount of cutting you have to do, I leave the tulle folded in half from the craft store if I want a long skirt. I unfold it and fold it in thirds for a shorter skirt.
That’s all you need to know to get started. For this tutorial I wanted a long skirt, so I left the tulle folded in half.
Step 1: For this tutorial I wanted a long skirt, so I left the tulle folded in half.

Step 2: I don’t worry about measuring the width. The skirt is going to be so full and the strips overlap so much that estimating is the best way to go. I use my hand as a good ruler for how wide to cut the strips.

Step 3: Cut the tulle. Because it is folded you are actually cutting through two to three layers- depending on how you have it folded, making multiple strips each time.

Step 4: After you have cut all the strips, stack them on top of each other and trim the ends. This ensures they are all the same length and will eliminate the folds so you have two or three strips instead of one long one.


The cutting everything is the longest part of the process and requires the most focus. Once you have them all trimmed to perfection you can sit back and just work on tying knots. (Tip: I use clothes pins to keep all of my colors together and prevent them from tangling together)
Step 5: I stretch the headband over my knee, it turns out to be the perfect way to see each of the gaps you want to tie your tulle to and keeps the tutu right in front of you.

Step 6: Fold your strip of tulle in half, with the fold between your fingers.

Step 7: Thread the folded end through the headband.

Step 8: The first layer of colors starts on the very bottom of the headband. Create a slip knot at every gap.

Hopefully in this picture you can see what I mean when I say you start tying the knots along the bottom layer:

Depending on the pattern of colors that you want, you will either alternate every other knot or do several of the same color in a row before switching to the next color.

Here’s a look at what the knots look like from the underside. I usually do three layers- so when I work my way around the bottom layer, I move up to the next row of gaps in the headband and start the process again.

For this tutu I wanted each color to overlap, so for the second layer I made sure that the colors weren’t lined up with the corresponding color on the first layer. I did the same thing for the third layer.

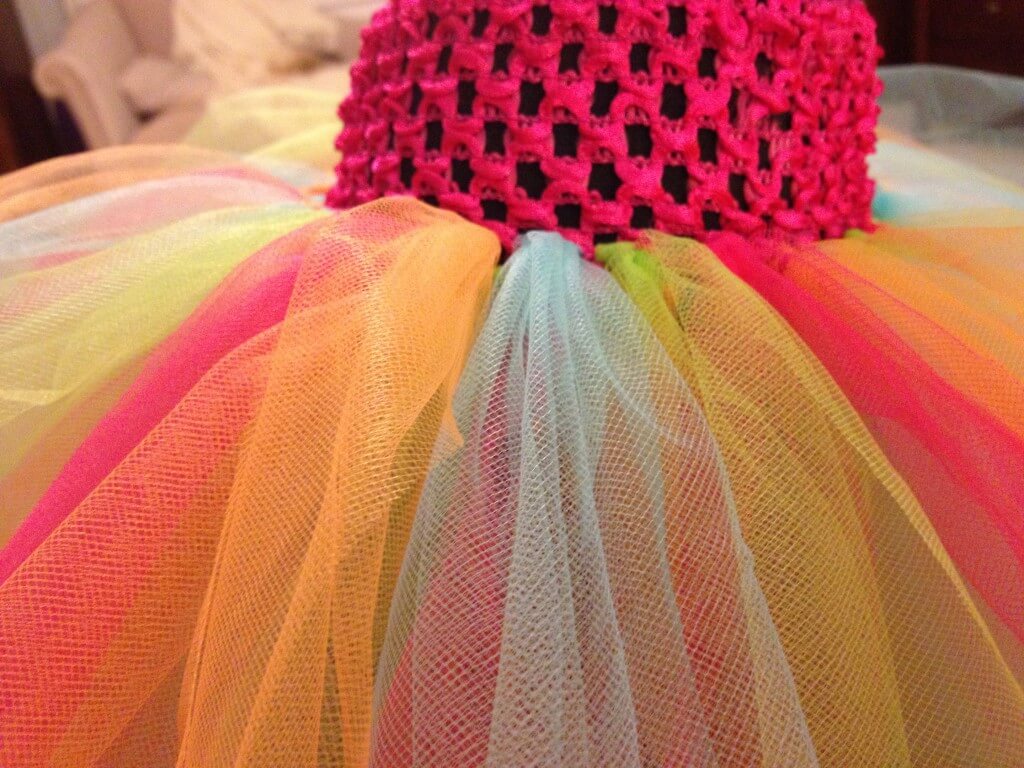
Here’s what it looked like when I was finished. At this point I will often trim the edges to make sure that everything is the same length. You can also cut a few inches off if you want the tutu to stick out more (think prima ballerina) rather than hang down around the little girl like a skirt.

I think it turned out pretty darn cute for Miss Rylee’s 1st Birthday Party! It withstood all of the moving and crawling and dancing. A little wrinkled, but still just darling!

Here are a couple of my favorites… If I have ever made one for your little one and didn’t get pictures of it myself, I would love it if your would send me a photo! If you are interested in buying a tutu rather than taking the time to make it, feel free to contact me. I am more than happy to try to accommodate. submit@walkingthroughwonderland.com.

Seminole Baby Tutu

American Flag Tutu
MOST RECENT IN "TRAVEL"
VIEW ALL
MOST RECENT IN "PROJECTS"
VIEW ALL


Pingback: Cosette's Rosette Smash Cake | Walking Through Wonderland
Pingback: Hey Judah | Newborn Photos | Walking Through Wonderland
Pingback: Cosette's Rosettes: Birthday Smash Cake - Walking Through Wonderland
Rylee loved her tutu and so did I! Thank you so much for sharing your talents!