I’ve finally started getting into hand lettering. I know I am way late to the lettering party, but now that I am here, I am loving it. I’ve been promising a hand lettering hacks article to a few friends for a while. I’m not sure if any of these ideas are really going to be ground breaking, but here are all my “secrets”.
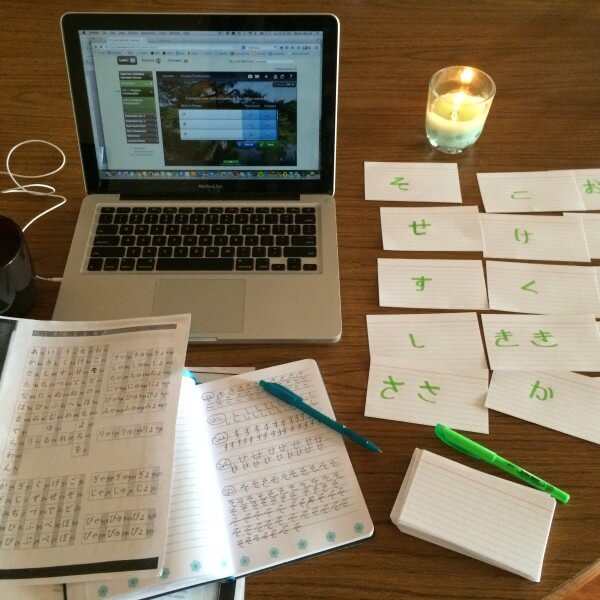
 Earlier this year I wrote that one of my 2015 resolutions was to learn calligraphy. It started after I bought ink and a traditional Japanese brush to practice my Hiragana and Katakana characters, but once I found myself hooked on writing characters I can’t really read, I decided maybe I should try out the English version and invest in a few nibs to see where my interest could go from there.
I love to write and I love to make things by hand. So hand lettering just seemed like a natural avenue to pursue. Unfortunately for my yet-to-be-developed hobby, this year has also been extremely full of other projects like crocheting and photography and cake decorating, so it wasn’t until a few weeks ago that I finally got around to ordering some calligraphy supplies. I will try my hand at calligraphy (puns!) as soon as my nibs arrive in Japan, so I’m definitely counting on it before 2016!
 In the meantime, I have been playing with different lettering styles on the chalkboard my sweet husband built in our craft room. At first I was just trying to get the hang of writing with chalk, so I’d look something up on pinterest or etsy and try to copy it. This was my first chalkboard and was 100% inspired by someone else’s creativity…
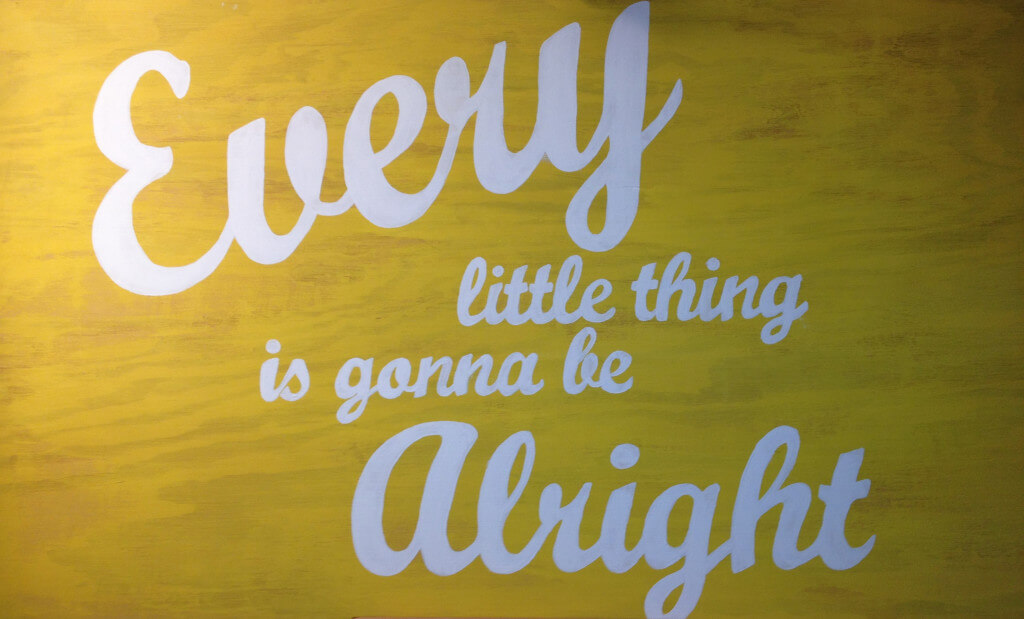
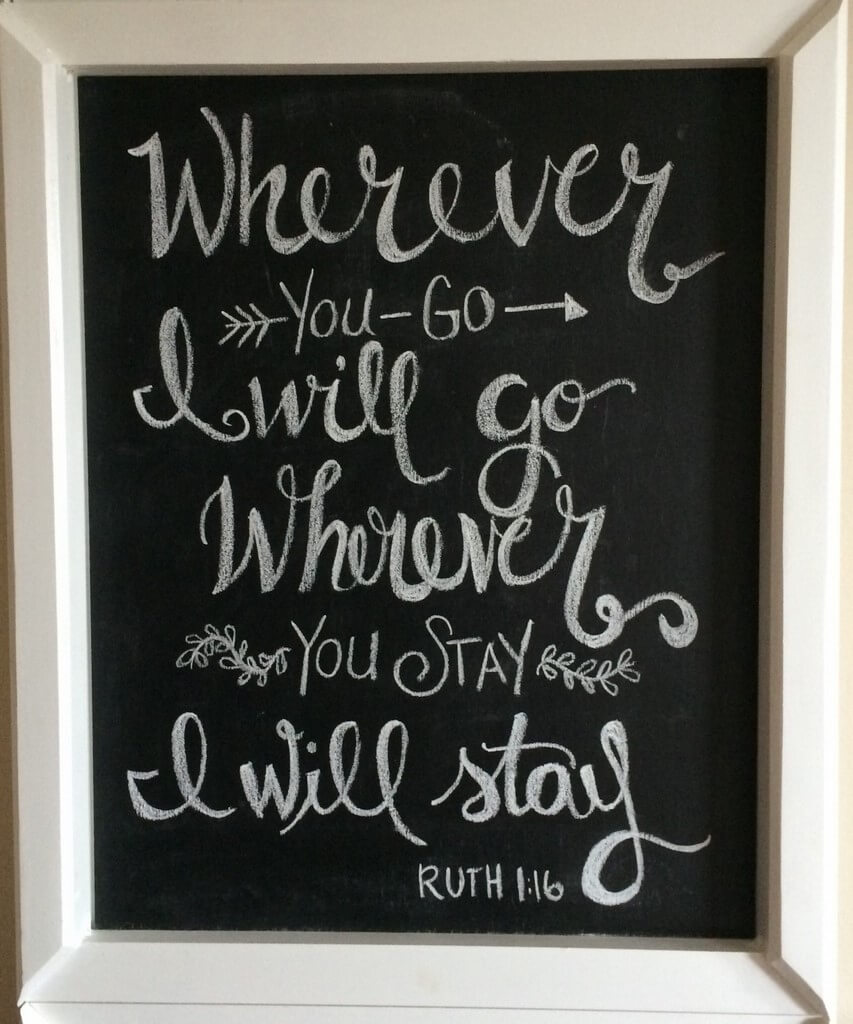
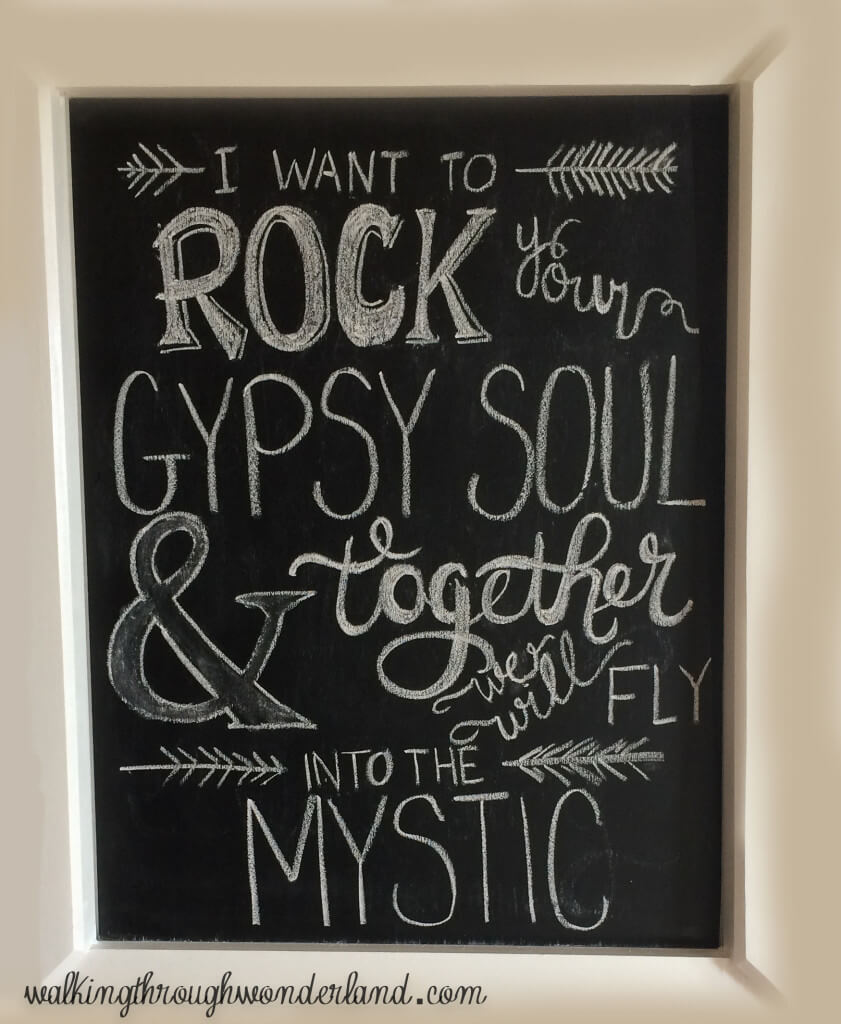
Ruth 1:16 was part of our vows and stayed on the chalkboard for a good couple of months, but right before Dane got home, I felt inspired to change it up. I couldn’t find anything that was really inspiring me on etsy, so I picked two of my favorite lines from one of our favorite songs and got to work coming up with my own rules for mixing and matching lettering styles.
 After that, I was hooked. Now I’ve decided that every new week deserves new chalk.
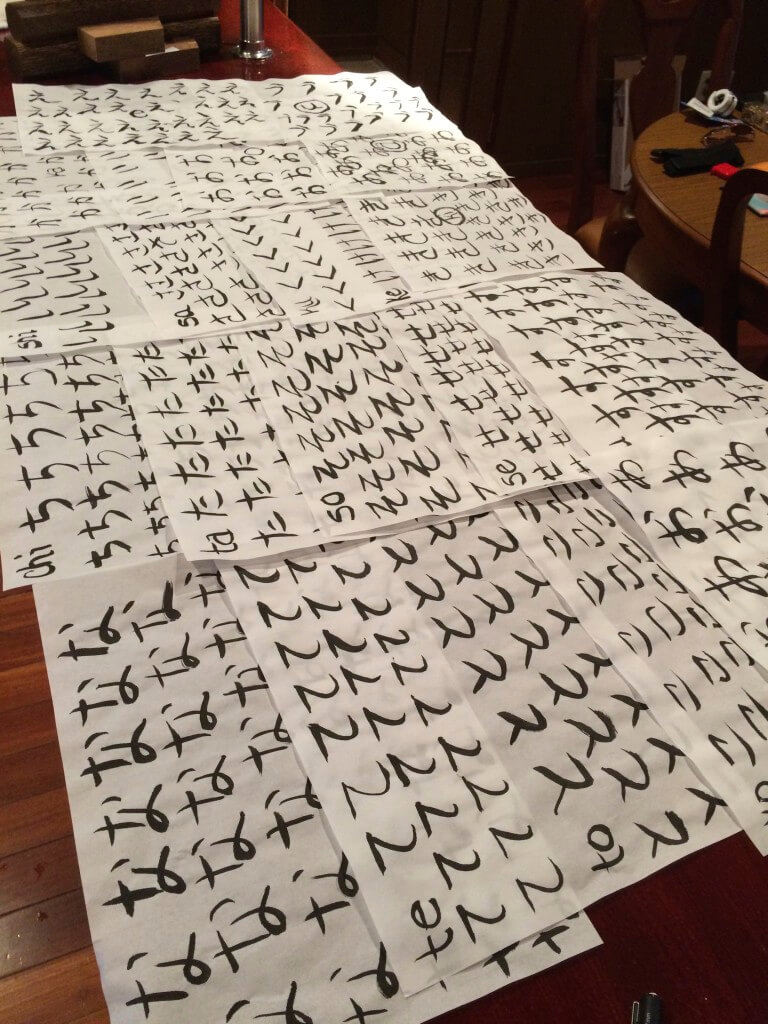
 I created the hashtag #letteringlately so that I could easily watch my progress, and since then, I’ve had a couple of friends ask me to reveal my tricks of the trade, (I’ve got them fooled!), because I really have no idea what I am doing. The beauty of chalk is that nothing is permanent- so you can write fearlessly! If you mess anything up, it only takes a quick swipe of the finger and it’s like the mistake never existed.
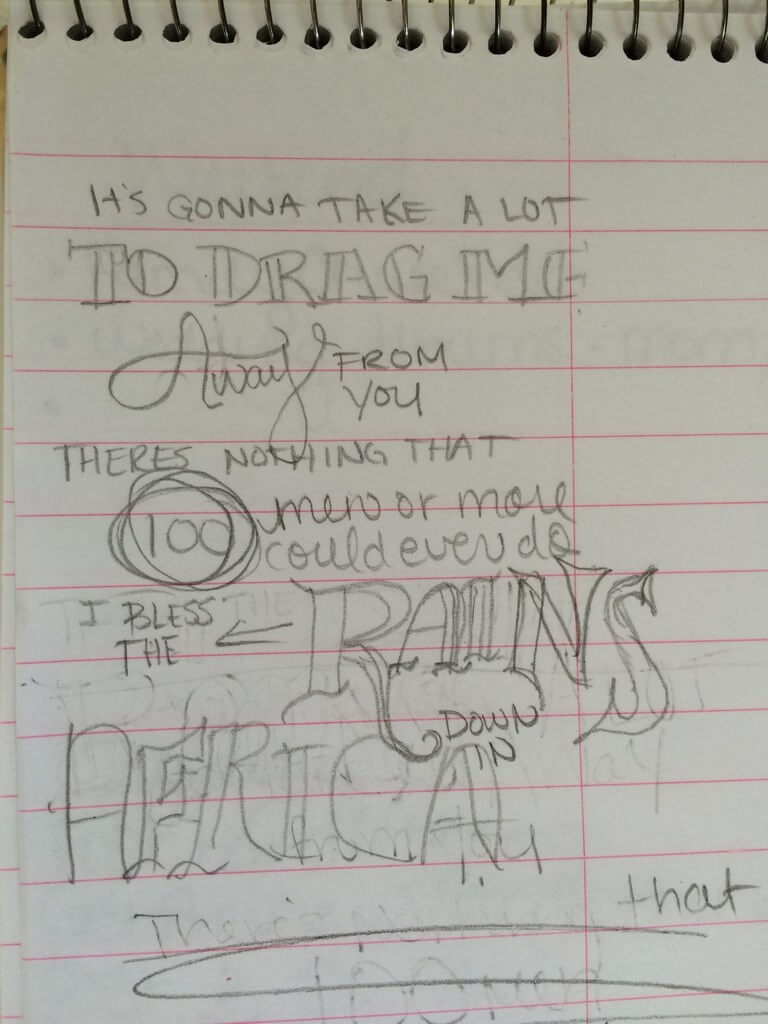 The only real tip I can give you is that before I go to the board, I quickly jot down whatever quote, verse or lyric is inspiring me on a scrap of paper that is shaped similarly to my chalk board (as in– a vertical rectangle). Just this one step has helped me immensely when it comes to spacing the lines and letters to best fit the space.
Now, while I’m not revealing any groundbreaking tips for chalk lettering like a pro… I do have a few other hand lettering hacks for mediums like ink and paint that I’ve been using since long before my chalkboard days. And, as fate would have it, most of them involve chalk! I’ve been meaning to do a hand lettering for dummies (I happily include myself in the dummy category) post for a while now, so I figured this was a good time to do it!
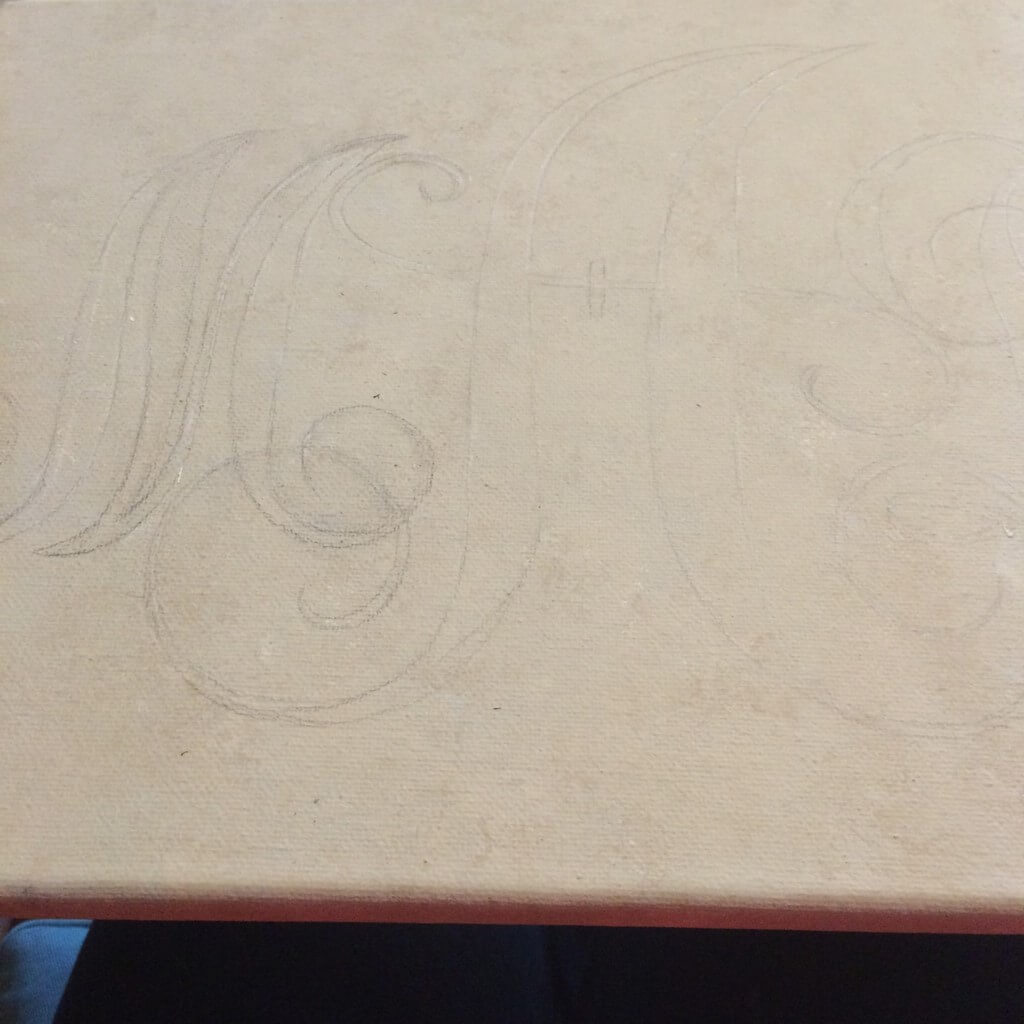
Whenever I’m in a hurry or have a clear idea of how I want something to come out– I turn to the computer. Maybe this is my because I’ve yet to become a freehand lettering pro, or maybe it’s because I used to spend 10 hours a day behind a computer. But one way or another, I’ve always used Adobe Illustrator (because it makes layering fonts on top of each other so easy) as the first step of any painted lettering project. I would play with fonts until I got things looking just right, and then print the design (tiling pages if necessary to get the size right).
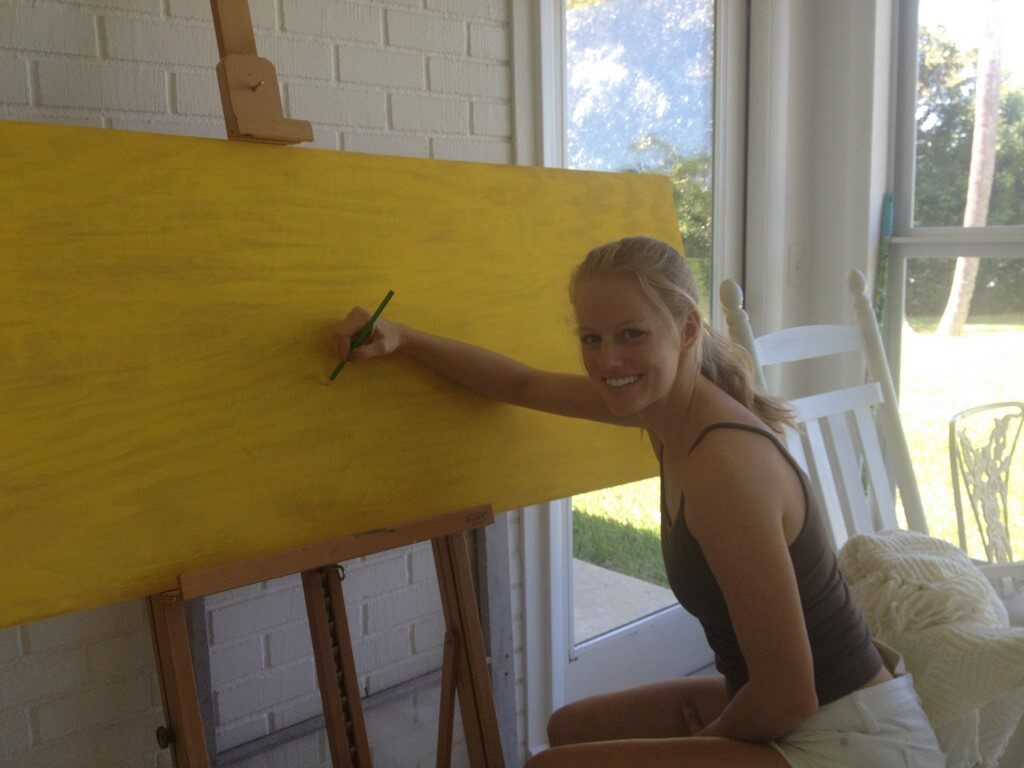
Prep your canvas or wood or whatever you are working with at least 8 hours before you are going to start with the lettering process to ensure that your base coat(s) are dry.

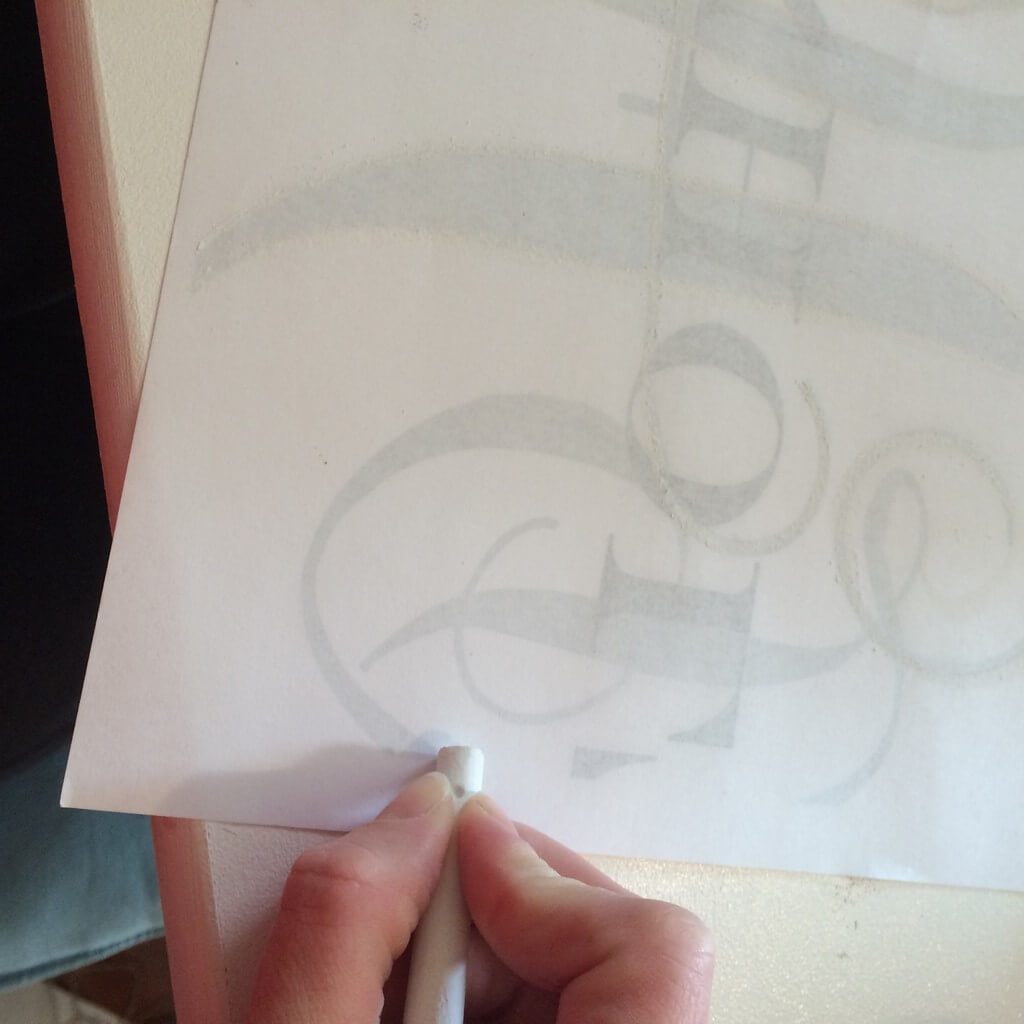
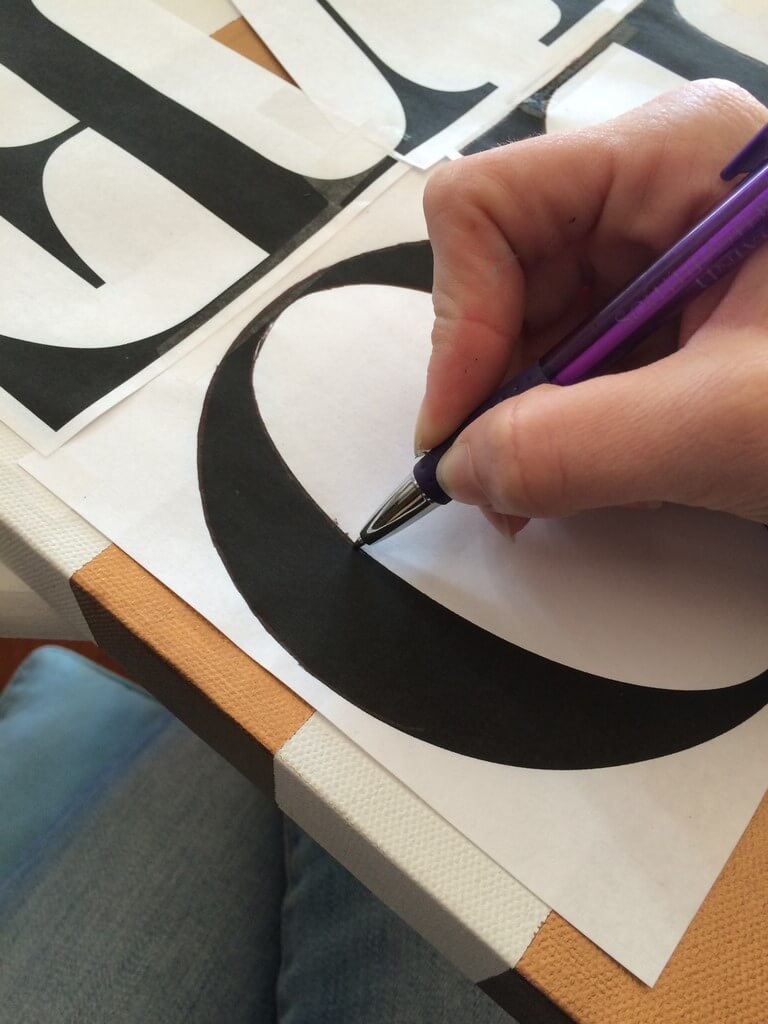
 Then flip the paper over and go chalk-dust-crazy. Because you can always see through printer paper, I usually trace around the edges of my design with the blunt side of the chalk, then rub the chalk horizontally across the whole page, then draw the outline again. You cannot have too much chalk in this stage. This is also why you want to make sure that base coat is dry!
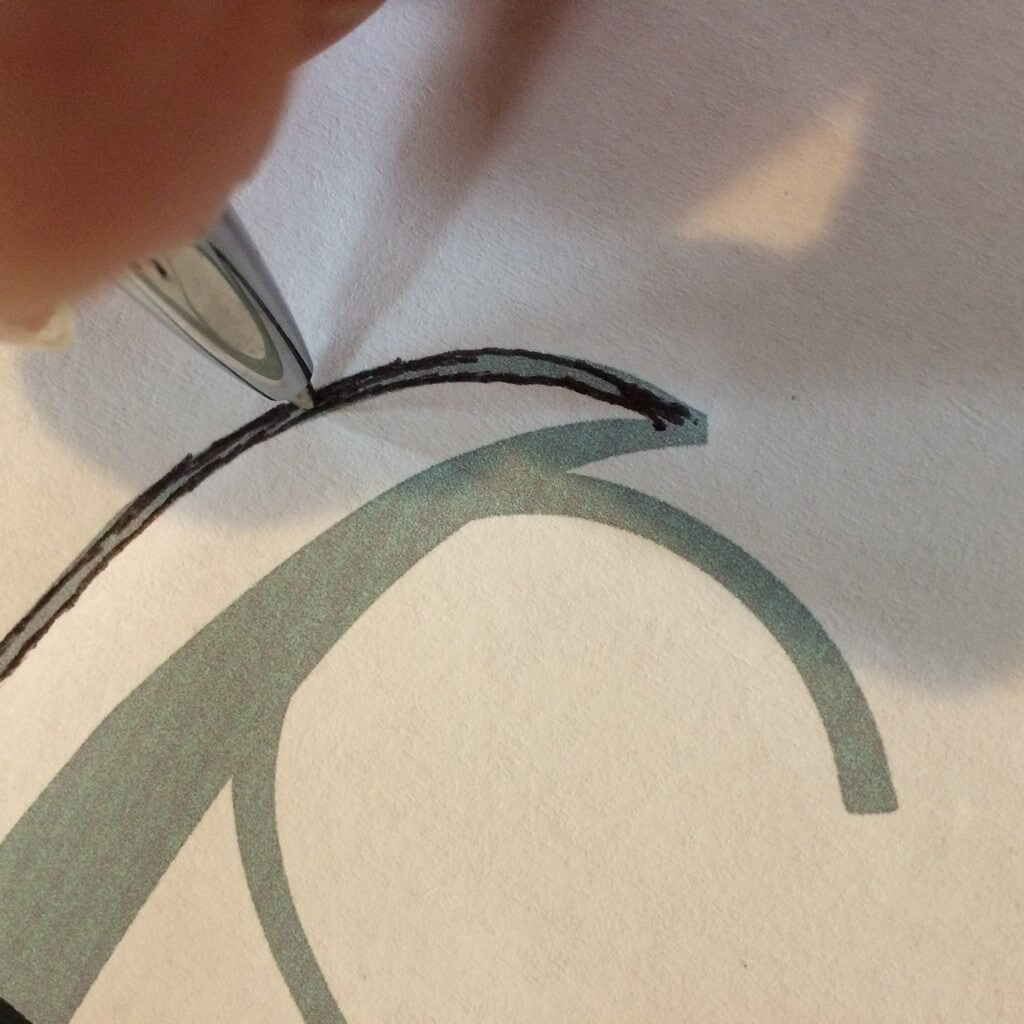
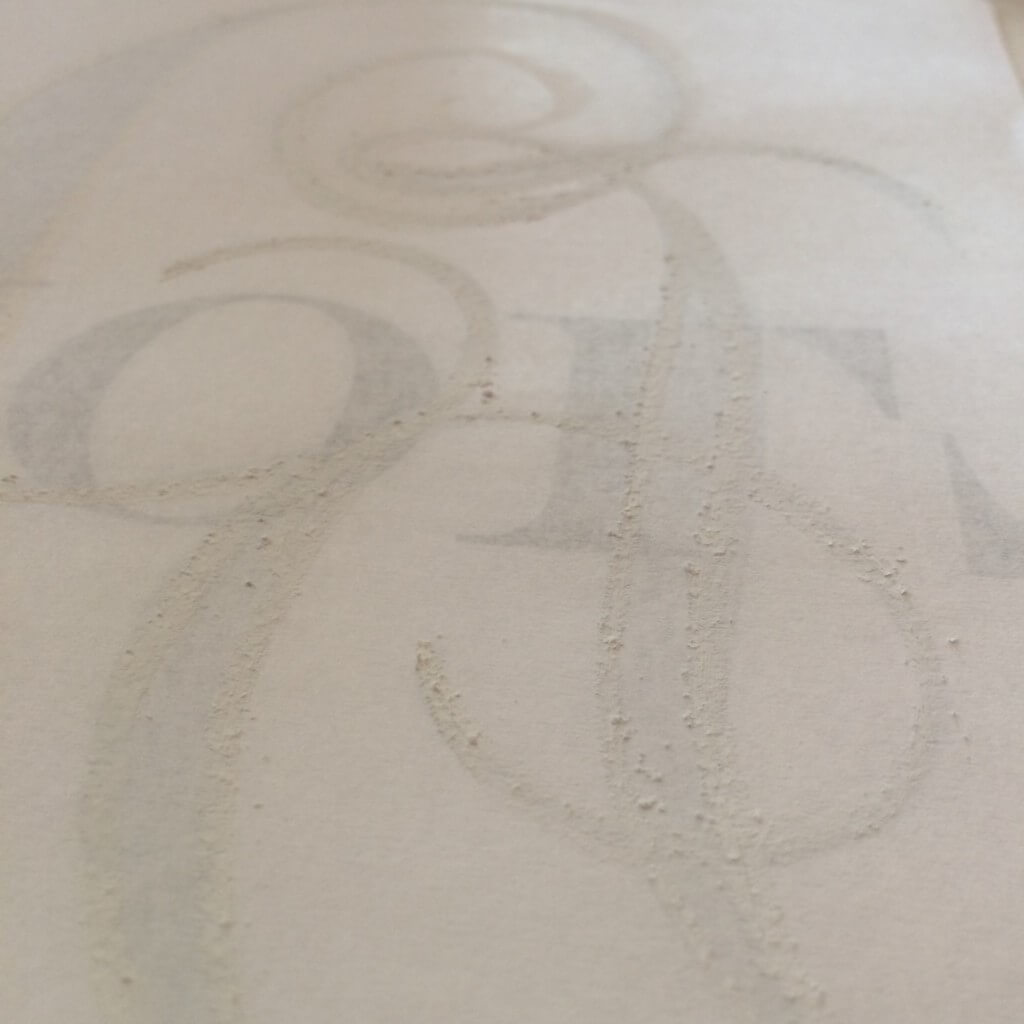 Now you flip that chalky paper over (chalk side down) and trace again, this time using a pen or pencil around the edges of your design. By applying pressure like this, you are making a chalk outline of your design on the painting surface. After that it’s as easy as painting within the lines!
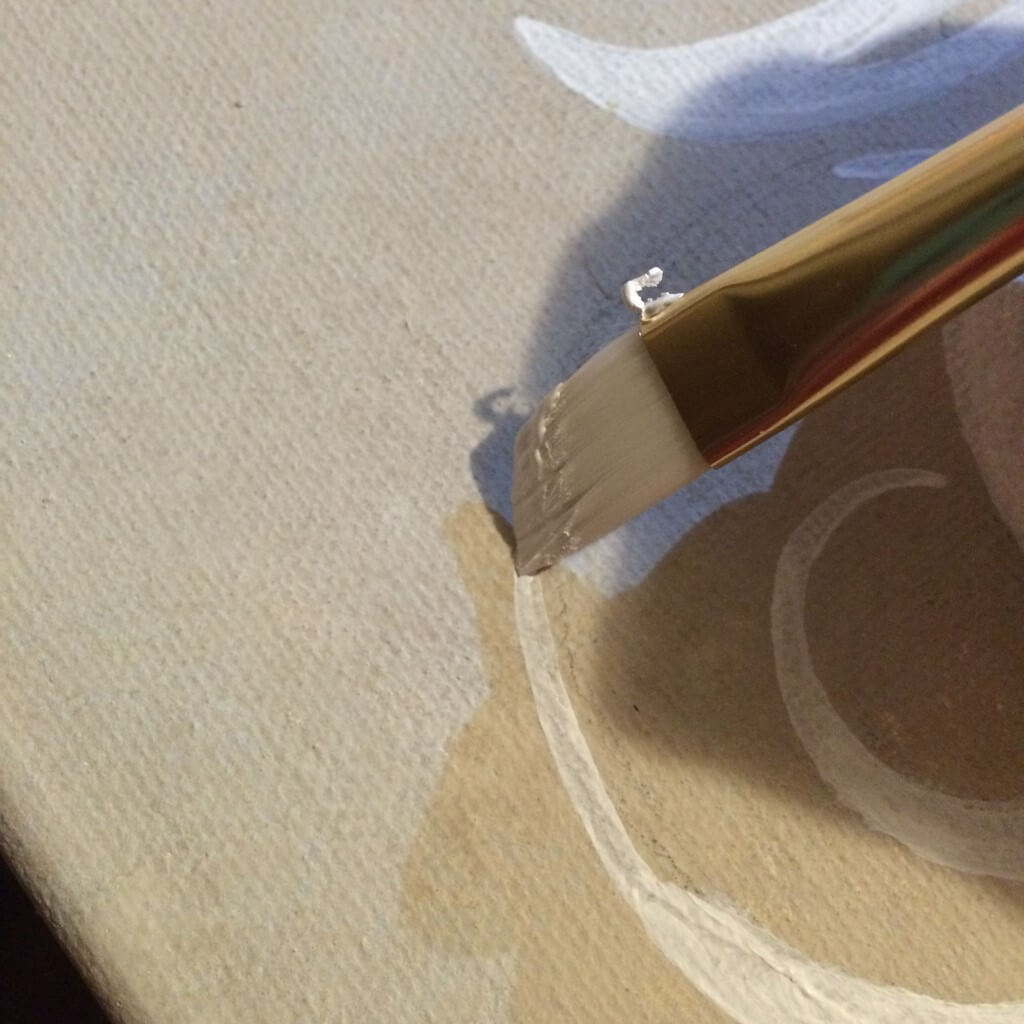
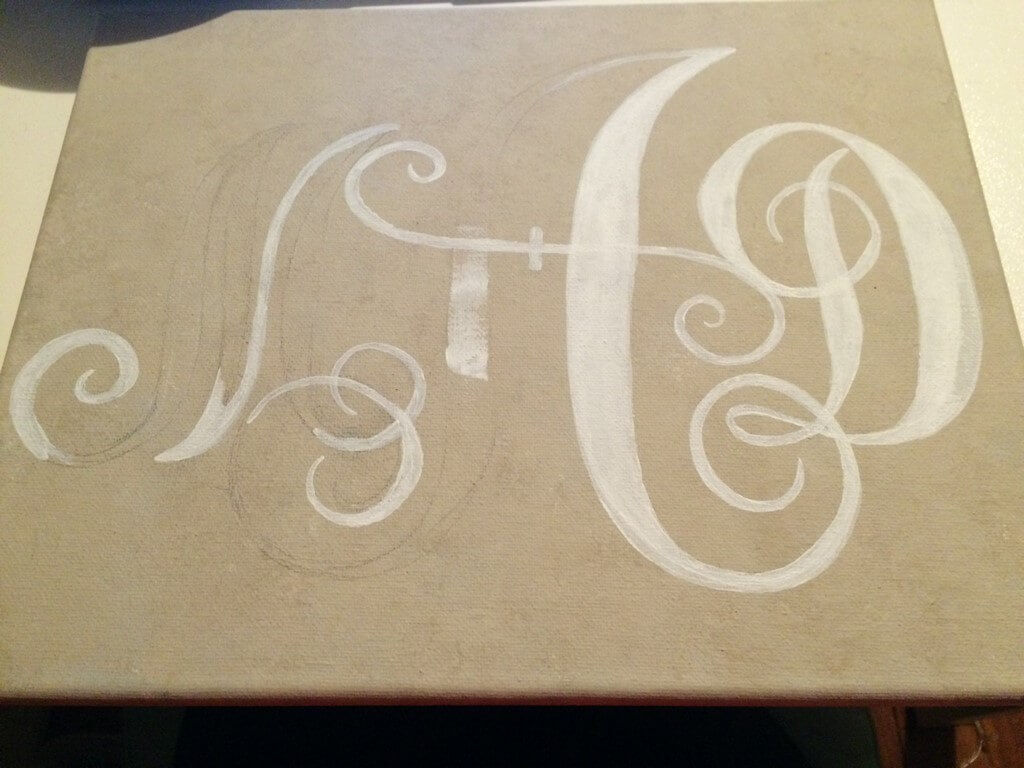
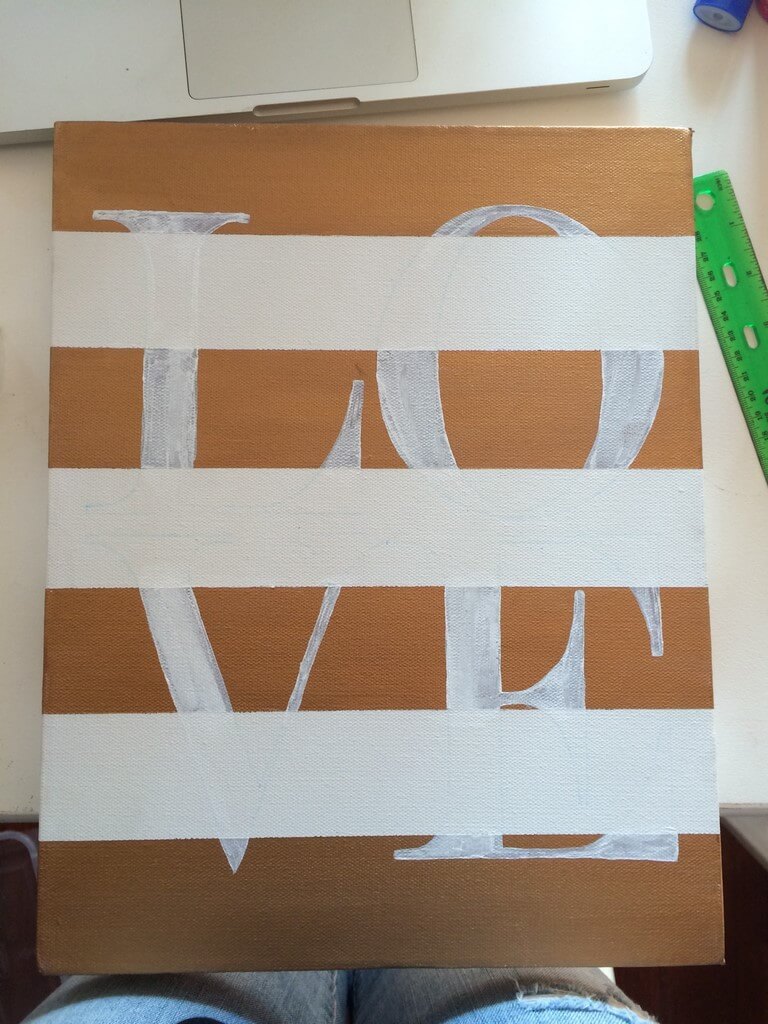
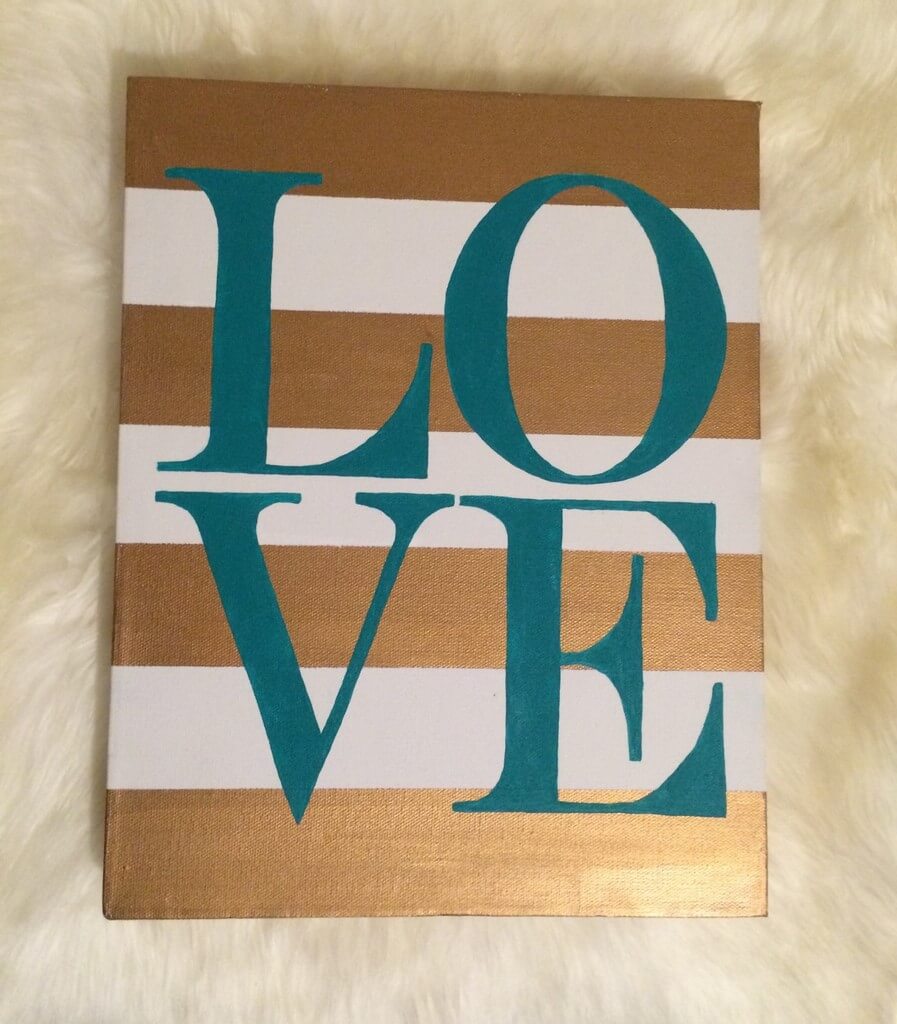
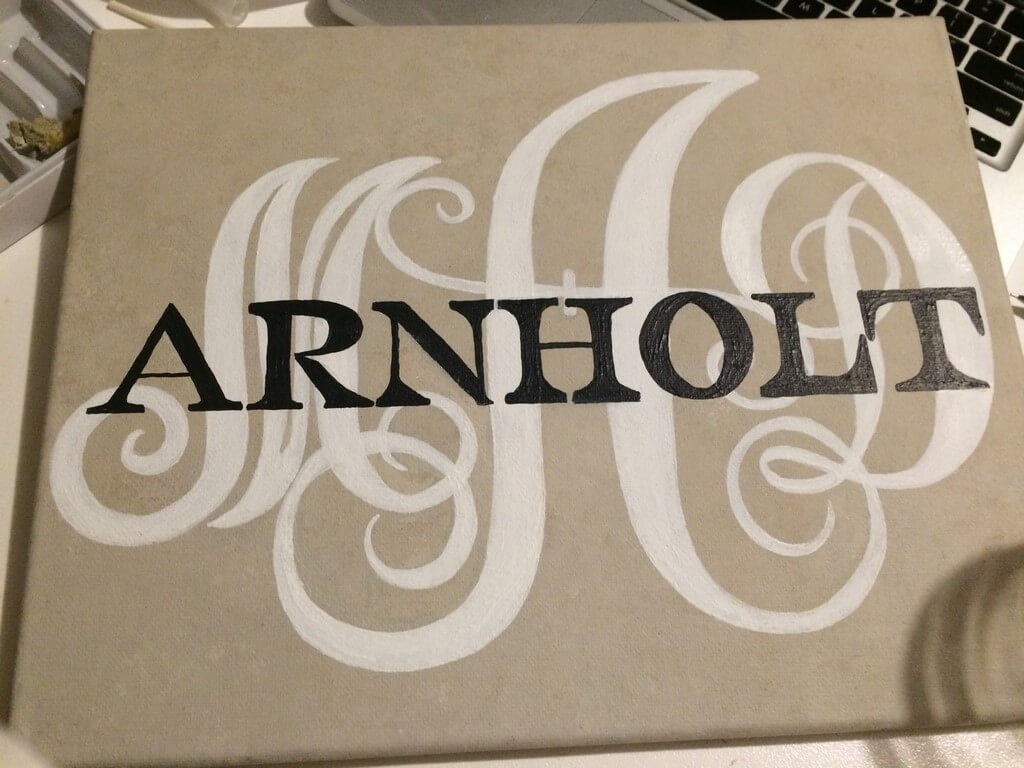 One thing to keep in mind, is that if you have a complicated background or multiple colors to work with, it’s best to prep the whole lettered area with a white primer or base coat before you begin painting with the final color.

 Rarely are you going to be painting much that is standard printer-paper size, which is why tiling can be helpful (check your printer settings for the best way to tile paper. Tiling means that rather than scaling your design to fit the paper size, it is printing at 100%, printing each quadrant on its own sheet of paper.) You can do this for any size artwork, but I will generally only use this method if I know it won’t need more than four sheets of paper to print the full-size design.
But what if you are painting something significantly bigger? Like a sign or a mural? The answer is so obviously simple (and all you smarty pants out there might already know where I am going with this) but it wasn’t for years after I started painting signs that this hand lettering hack ever occurred to me, so I am sharing it like it’s a brand new, brilliant idea!
Print your design on a piece of 8.5×11 paper, just like you would for the paintings above. Now… PROJECT it onto the wall. If you have an easel, great. If not, just prop your surface up against the wall as flush as you can get it. Use a table and books if you need to. Just make sure there isn’t a lot of “tilt” to it. Now move that projector around until it lines up perfectly on the wood/canvas/paper and step back to admire your design. Looks lovely on that giant piece of cardboard you just taped to the wall, doesn’t it? Okay now stop admiring and get to tracing. Once traced, you can turn off the projector and when it’s painting time… just stay inside the lines!


MOST RECENT IN "TRAVEL"
VIEW ALL
MOST RECENT IN "PROJECTS"
VIEW ALL

Pingback: The Bat- Walking Through Wonderland
Very timely for me with all these poetry illustrations I’ve been doing these days! One tip I have seen out there is, if you’re painting on wood, to trace the letters on top of the paper with a ballpoint pen. It apparently creates enough of a outline that it’s easier to keep the paint inside the letter. :)
I love your chalk board and I am crazy jealous of your artistic abilities….in fact I think in a few months time (I.e when I am home) maybe we (as in you!) should host a crafty themed blogger meet up
I’m in! And Erin can teach us how to sew!